printable art therapy activities pdf

Printable art therapy activities, often available as PDFs, offer accessible emotional healing through engaging exercises for various ages and therapeutic needs, fostering personal growth.

These resources, found on platforms like DeviantArt, provide a convenient and cost-effective way to explore self-expression and well-being.

What is Art Therapy?

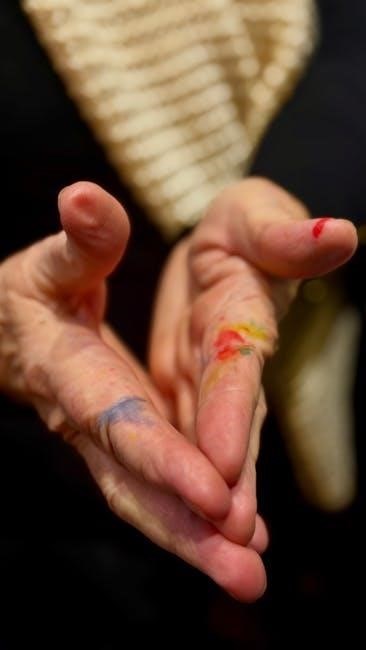
Art therapy is a mental health profession that utilizes the creative process of art making to improve mental and emotional well-being. It’s founded on the belief that artistic expression can help individuals explore emotions, reduce stress, and increase self-awareness.

Printable art therapy activities, delivered as PDFs, extend this practice by making therapeutic tools readily available. These aren’t about artistic skill; they’re about the process of creation.

Worksheets and prompts, easily downloaded and used, guide individuals through exercises like coloring, doodling, and directed drawing. These activities can be utilized in individual or group settings, offering a non-verbal outlet for processing complex feelings, particularly beneficial for those who struggle with verbal communication. Resources on platforms like DeviantArt showcase the breadth of available options.

Benefits of Using Printable Art Therapy

Printable art therapy activities, conveniently accessed as PDFs, offer numerous advantages. Accessibility is key – resources are available anytime, anywhere, removing barriers to mental wellness support. Cost-effectiveness is another benefit, with many free or affordable options available online, including those found on DeviantArt.

These activities promote self-expression, allowing individuals to explore emotions without the pressure of verbalizing them. They can reduce anxiety and stress, fostering relaxation and mindfulness.

Furthermore, printable worksheets cater to diverse needs, with specialized options for trauma processing, children, and adults. The creative process itself is empowering, boosting self-esteem and providing a sense of accomplishment. Bundles of activities offer a comprehensive approach to emotional healing.

Types of Printable Art Therapy Activities

Printable art therapy activities PDFs encompass diverse techniques like mandala coloring, doodle prompts, directed drawing, and color association exercises, fostering self-discovery.

Mandala Creation & Coloring

Mandala creation and coloring, readily available as printable art therapy activities PDFs, represent a cornerstone of this therapeutic approach. Mandalas, with their intricate circular designs, symbolize wholeness and the self. The repetitive act of coloring within a mandala’s boundaries can be profoundly meditative, reducing anxiety and promoting a sense of calm.

These PDFs often offer pre-drawn mandalas of varying complexity, catering to different skill levels and preferences. Alternatively, some resources guide users through creating their own mandalas from scratch, enhancing the creative process and personal investment. The focus isn’t on artistic skill, but rather on the mindful engagement with color and form, allowing emotions to surface and be processed non-verbally. This practice is beneficial for both children and adults seeking emotional regulation.

Doodle Prompts for Emotional Exploration

Doodle prompts, frequently found within printable art therapy activities PDFs, offer a less structured approach to emotional expression than mandala coloring. These prompts encourage spontaneous drawing, bypassing the conscious mind and allowing subconscious feelings to emerge. Examples might include “Draw your safe place,” or “Doodle what anxiety feels like.”

The beauty of doodling lies in its accessibility; no artistic talent is required. PDF resources often provide a series of prompts, guiding users through a journey of self-discovery. This method is particularly effective for individuals who struggle with verbalizing their emotions. The resulting doodles can then be explored further, either independently or with a therapist, to gain deeper insights into one’s inner world and promote emotional healing.

Directed Drawing for Self-Expression

Directed drawing, often included in printable art therapy activities PDFs, provides a structured yet creative outlet for self-expression. Unlike freeform doodling, directed drawing offers step-by-step instructions to create a specific image, like a tree, a house, or an animal.

The therapeutic benefit isn’t in artistic skill, but in the process of creation. These PDFs can include prompts asking users to imbue their drawing with personal meaning – for example, drawing a tree representing strength and resilience. This technique is beneficial for those who find comfort in structure, or who struggle with initiating art independently. It allows for exploration of emotions through symbolism and visual metaphor, fostering self-awareness and emotional release.

Color Association Exercises

Color association exercises, frequently found within printable art therapy activities PDFs, tap into the powerful psychological impact of color. These PDFs typically present a list of colors – red, blue, yellow, green, and so on – and ask the user to write down the first emotions, memories, or sensations that come to mind when viewing each hue.

This isn’t about “right” or “wrong” answers; it’s about uncovering subconscious connections. The exercise can reveal hidden feelings, unresolved issues, or deeply held beliefs. Some printable resources may even include coloring pages with specific prompts, encouraging users to express their current emotional state through color choices. This simple yet effective technique promotes self-reflection and emotional awareness.

Art Therapy Activities for Specific Needs

Printable art therapy activities PDFs cater to diverse needs, including anxiety relief, trauma processing, and support for children and adults, offering targeted emotional support.

Activities for Anxiety Relief

Printable art therapy activities PDFs offer several techniques specifically designed to alleviate anxiety. Coloring mandalas, a popular choice, promotes focus and calmness, diverting attention from anxious thoughts. Doodle prompts encourage free-flowing expression, allowing individuals to externalize worries without judgment.

Directed drawing exercises, focusing on simple shapes and patterns, can be grounding and meditative. Color association activities, where individuals link colors to emotions, help identify and process anxious feelings. These printable resources provide accessible tools for self-soothing and emotional regulation.

Furthermore, worksheets incorporating positive affirmations alongside artistic expression can reinforce coping mechanisms and build resilience. The act of creating, regardless of artistic skill, is inherently therapeutic and can significantly reduce anxiety levels.

Activities for Processing Trauma (PTSD)

Printable art therapy activities PDFs can provide a safe and non-verbal outlet for individuals processing trauma and PTSD. These resources often include prompts designed to explore difficult emotions at a comfortable pace, avoiding direct recounting of traumatic events initially.

Symbolic drawing exercises, where individuals represent experiences through imagery, can be particularly helpful. Coloring can offer a grounding sensation, while abstract art allows for expression beyond words. Worksheets focusing on identifying safe places or supportive figures can foster a sense of security.

It’s crucial to remember these printable tools are best used as adjuncts to professional therapy, offering a supplementary means of emotional processing and self-discovery. They can help build self-awareness and coping skills.

Activities for Children & Adolescents

Printable art therapy activities PDFs tailored for younger individuals often emphasize playfulness and imagination. Bundles specifically designed for kids, like the 60-page worksheet collection, offer age-appropriate prompts to explore feelings and build self-esteem.

Activities might include drawing their emotions as colors or creatures, creating “safe space” artwork, or completing unfinished drawings to encourage self-expression. Mandala coloring pages are excellent for promoting relaxation and focus. Simple doodle prompts can unlock creativity and emotional release.

These printable resources are valuable tools for therapists, teachers, and parents, providing a gentle way to support children’s emotional well-being and foster healthy coping mechanisms.

Activities for Adults

Printable art therapy activities PDFs for adults often focus on deeper emotional processing and self-discovery. These resources provide structured exercises to address anxiety, trauma, and other mental health concerns, offering a safe outlet for expression.

Worksheets may include prompts for exploring past experiences through drawing, creating visual metaphors for current challenges, or utilizing color association to identify underlying emotions. Mandala creation and coloring remain beneficial for stress reduction and mindfulness.

These printable materials can be used for self-guided exploration or incorporated into professional therapy sessions, offering a flexible and accessible approach to emotional healing and personal growth.

Finding and Accessing Printable Art Therapy PDFs

Printable art therapy activities PDFs are readily available on platforms like DeviantArt, through online therapy worksheets, and in bundled resources, offering varied options.

DeviantArt as a Resource

DeviantArt emerges as a vibrant online community and a surprisingly rich resource for discovering printable art therapy activities. With over 350 million pieces of art shared, it’s a hub where artists and enthusiasts connect, and many creators offer therapeutic worksheets.

While primarily known for diverse artwork – including fan art, comics, and even Roblox-inspired creations – DeviantArt hosts numerous PDFs specifically designed for emotional exploration. Users can find a range of art therapy worksheets tailored for different age groups and needs, from anxiety relief to processing trauma.

Searching keywords like “art therapy” or “therapy worksheets” within the platform yields a wealth of options. Remember to explore different artists’ galleries, as they often bundle activities or offer free downloads alongside paid resources.

Online Therapy Worksheets & Bundles

Beyond DeviantArt, numerous online platforms specialize in printable art therapy activities, often offering comprehensive PDF bundles. These resources cater to therapists, teachers, and individuals seeking self-help tools for emotional well-being.

You can find extensive collections, like a 60-page worksheet bundle specifically designed for kids, providing a diverse range of exercises. These bundles frequently address specific needs, such as anxiety, PTSD, and general emotional processing, for both children and adults.

Many sites offer both free and paid options, allowing users to sample activities before committing to larger purchases. Exploring these curated collections streamlines the process of finding suitable exercises, saving time and effort.

Free vs. Paid Printable Resources

Printable art therapy activities in PDF format are available through both free and paid channels, each offering distinct advantages. Free resources provide an accessible entry point for exploring basic techniques and prompts, ideal for initial experimentation or limited budgets.

However, paid resources, like comprehensive worksheet bundles, generally offer greater depth, variety, and professional curation. These often include targeted exercises for specific issues – anxiety, trauma – and cater to different age groups, ensuring relevance and effectiveness.

The choice depends on individual needs and resources; free options are excellent for beginners, while paid bundles provide a more robust and specialized toolkit for ongoing therapeutic exploration.

Creating Your Own Printable Art Therapy Activities

Printable art therapy activities can be personalized with simple prompts, adapted for various ages, and require minimal materials for accessible emotional exploration and self-expression.

Simple Prompts & Exercises

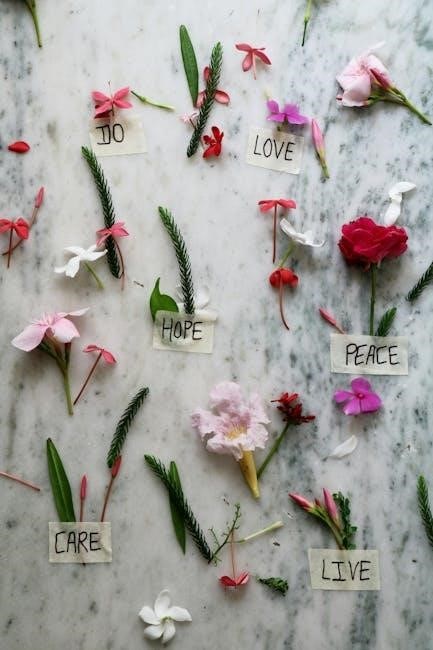
Creating effective printable art therapy activities begins with straightforward prompts. Consider “Draw your safe place,” encouraging visualization and emotional grounding. Another option is “Color associations” – assigning feelings to colors and expressing them visually.

Simple doodle prompts like “Draw how you’re feeling today without thinking” can unlock subconscious emotions; For trauma processing, prompts focusing on strength and resilience, like “Draw your inner warrior,” can be beneficial.

Remember to keep instructions concise and open-ended, allowing for individual interpretation. These printable PDF exercises don’t require artistic skill, emphasizing the process of self-discovery over the final product. Adapt prompts to suit different age groups and therapeutic goals, ensuring accessibility and relevance.

Adapting Activities for Different Age Groups

Printable art therapy activities PDFs require careful adaptation for varying developmental stages. For children, utilize simpler prompts like coloring pages with emotional themes or drawing their feelings as animals. Focus on playfulness and non-verbal expression.

Adolescents benefit from more complex prompts exploring identity and relationships, such as creating a collage representing their aspirations. Allow for greater self-direction and abstract expression.

Adults can engage with prompts addressing trauma, anxiety, or life transitions, like drawing a map of their emotional landscape. Encourage detailed reflection and journaling alongside the art-making process.

Always consider cognitive abilities and emotional maturity when selecting or modifying printable exercises.

Materials Needed for Printable Art Therapy

Utilizing printable art therapy activities PDFs necessitates a minimal, accessible materials list. Core supplies include a printer to access the downloaded worksheets, and basic art tools like pencils, crayons, colored pencils, or markers.

Depending on the specific activity, you might also need paints, brushes, collage materials (magazines, newspapers, glue), or clay. Paper quality is important; heavier weight paper is ideal for painting or mixed media.

Journals or notebooks are beneficial for reflective writing accompanying the artwork.

The beauty of these printable resources lies in their adaptability – materials can be tailored to individual preferences and budgetary constraints, fostering creativity and self-expression.

Considerations When Using Printable Art Therapy

Printable art therapy activities PDFs require a safe space and ethical boundaries; professional help is crucial when dealing with trauma or complex emotional needs.

Ethical Considerations & Boundaries

Using printable art therapy activities PDFs necessitates mindful ethical practice. These resources are not a substitute for qualified mental health professionals, especially when addressing trauma or serious conditions like PTSD.

Individuals facilitating these activities should maintain clear boundaries, avoiding interpretation beyond the participant’s self-identified meaning. It’s vital to emphasize that these are tools for self-exploration, not diagnosis or treatment.

Confidentiality is paramount; artwork shared should be treated with respect and privacy. Providers must be aware of their scope of practice and refer clients to licensed therapists when appropriate. Always prioritize the well-being and safety of the individual engaging with the printable art therapy.

The Importance of a Safe Space

Creating a safe and supportive environment is crucial when utilizing printable art therapy activities PDFs. This space, whether physical or emotional, allows for vulnerability and honest self-expression without judgment.

Participants need to feel secure enough to explore difficult emotions and experiences through art. A safe space encourages authenticity and minimizes the risk of re-traumatization, particularly when working with sensitive topics.

Ensure privacy and confidentiality, and emphasize that there are no “right” or “wrong” ways to create art. The focus should be on the process of self-discovery, not the aesthetic quality of the artwork. A nurturing atmosphere maximizes the therapeutic benefits of these printable activities.

When to Seek Professional Help

While printable art therapy activities PDFs can be beneficial, they are not a substitute for professional mental health care. If you are experiencing significant emotional distress, trauma, or suicidal thoughts, seeking help from a qualified therapist is essential.

These printable activities can be a helpful supplement to therapy, but should not be used as a sole treatment for serious mental health conditions. Look for a licensed art therapist or counselor experienced in trauma-informed care.

If printable art therapy evokes overwhelming emotions or triggers painful memories, discontinue use and consult a professional. Prioritize your well-being and remember that seeking help is a sign of strength, not weakness.

silfab 295 spec sheet pdf

Silfab 295 Spec Sheet PDF: A Comprehensive Overview

Silfab Solar’s SLA-X 295 modules, utilizing monocrystalline cells, boast a rated power of 295W and a 30-year output warranty, detailed within their specification sheets.

These PDFs outline electrical characteristics, mechanical dimensions, and performance data, crucial for installers and project developers seeking optimal solar solutions.

Accessing the official Silfab 295 spec sheet PDF provides comprehensive insights into certifications, temperature coefficients, and bifacial technology details.

Silfab Solar, a North American leader in PV module manufacturing, has established a reputation for high-efficiency and reliability within the solar energy sector. The company focuses on producing premium-quality monocrystalline modules, and the SLA-X 295 series exemplifies this commitment. This particular module, delivering a peak power output of 295W, is designed for both residential and commercial applications, offering a compelling balance between performance and cost-effectiveness.

The Silfab SLA-X 295 is engineered with advanced cell technology, aiming to maximize energy yield even in challenging conditions. Understanding the specifications detailed in the official spec sheet PDF is paramount for installers, system designers, and end-users. These documents provide critical information regarding electrical characteristics, mechanical dimensions, and warranty details, ensuring optimal system performance and longevity. The module’s design prioritizes durability and long-term power output, making it a valuable asset for any solar energy investment.

Silfab’s dedication to quality control and innovation is reflected in the rigorous testing and certification processes applied to the 295W module, as documented in their comprehensive spec sheets.

Understanding the Silfab SLA-X 295 Series

The Silfab SLA-X 295 series represents a significant offering within Silfab Solar’s product line, characterized by its high efficiency and robust design. This series utilizes monocrystalline solar cells, optimized for superior performance in diverse environmental conditions. The spec sheet PDF details that these modules are built to withstand harsh weather, featuring a durable construction and reliable power output.

Key features of the SLA-X 295 include its optimized power density, achieving 16.8W per square foot, making it ideal for maximizing energy generation on limited roof spaces. The spec sheet provides precise electrical specifications, including open-circuit voltage, short-circuit current, and maximum power point voltage. Understanding these parameters is crucial for proper system integration and performance prediction.

Furthermore, the series benefits from Silfab’s commitment to quality, backed by a comprehensive 30-year power output warranty, fully outlined in the downloadable PDF. This warranty underscores the long-term reliability and investment value of the SLA-X 295 modules.

Key Features and Benefits

The Silfab SLA-X 295 module boasts several key features, prominently highlighted in its spec sheet PDF. Its high-efficiency monocrystalline cells deliver exceptional power output, maximizing energy production even in less-than-ideal conditions. A significant benefit is the module’s bifacial capability, allowing it to generate power from both sides, increasing overall energy yield – details are thoroughly documented.

The spec sheet emphasizes the module’s robust construction, ensuring long-term durability and resistance to environmental stressors like wind, snow, and hail. This translates to reduced maintenance costs and a longer operational lifespan. Furthermore, the optimized design allows for greater power density, making it suitable for installations with limited roof space.

Beyond performance, the Silfab 295 offers peace of mind with a comprehensive 30-year power output warranty, a key benefit detailed within the PDF. This warranty, coupled with Silfab’s reputation for quality, makes it a reliable and valuable investment for residential and commercial solar projects.

Electrical Specifications of the Silfab 295

According to the Silfab 295 spec sheet PDF, the module exhibits a rated power output of 295W under Standard Test Conditions (STC). Open circuit voltage (Voc) typically ranges around 39.8V, while short circuit current (Isc) is approximately 8.93A. Maximum power voltage (Vmp) is around 32.5V, and maximum power current (Imp) is approximately 8.11A.

The module’s efficiency is a notable characteristic, often exceeding 16.8W per square foot, optimizing energy harvest from available roof area. The spec sheet details the temperature coefficients, crucial for predicting performance in varying climates. Power output decreases with increasing temperature, a factor quantified in the documentation.

Furthermore, the PDF outlines the module’s nominal maximum system voltage of 1000V DC, a critical parameter for system design and safety. These electrical specifications, meticulously detailed in the document, are essential for installers and engineers to ensure optimal system performance and compliance.

Mechanical Specifications and Dimensions

The Silfab 295 spec sheet PDF details precise mechanical attributes vital for installation planning. Typically, these modules measure approximately 65.7 inches (1670 mm) in length, 39.2 inches (996 mm) in width, and 1.6 inches (40 mm) in thickness. The module’s weight generally falls around 41.8 lbs (19 kg), influencing roof load considerations.

The front glass is constructed from tempered glass, ensuring durability and resistance to environmental factors. The frame is commonly made of anodized aluminum alloy, providing structural support and corrosion resistance. The junction box, typically located on the rear of the module, is rated for IP67 protection, safeguarding against dust and water ingress.

Furthermore, the spec sheet outlines the module’s cell arrangement and the type of backsheet used, contributing to overall module longevity. These dimensions and material specifications are crucial for ensuring compatibility with mounting systems and adhering to building codes.

Performance Data: Power Output and Efficiency

The Silfab 295 spec sheet PDF showcases robust performance metrics. The nominal maximum power (Pmax) is rated at 295W under Standard Test Conditions (STC) – 1000 W/m² irradiance, 25°C cell temperature, and AM 1.5 spectrum. Module efficiency typically ranges around 16.8W per square foot, optimizing space utilization.

Open-circuit voltage (Voc) generally falls between 39.8V and 40.5V, while short-circuit current (Isc) is around 8.8A to 9.0A. Maximum power voltage (Vmp) is typically 32.4V, and maximum power current (Imp) is approximately 9.1A. These values are critical for system design and inverter compatibility.

The spec sheet also details power tolerance, usually ±3%, indicating the actual power output may vary slightly from the rated value. Bifacial versions demonstrate increased energy yield due to rear-side power generation, enhancing overall system performance and return on investment.

Temperature Coefficients and Their Impact

The Silfab 295 spec sheet PDF meticulously details temperature coefficients, crucial for predicting real-world performance. The power temperature coefficient is typically around -0.35%/°C, meaning power output decreases by 0.35% for every degree Celsius above 25°C. This is a standard characteristic of solar modules.

Voltage temperature coefficient is generally -0.30%/°C, indicating a voltage drop with increasing temperature. Current temperature coefficient is around +0.04%/°C, showing a slight increase in current. Understanding these coefficients is vital for accurate energy yield estimations, especially in hotter climates.

Higher operating temperatures, common in summer months, can reduce module output. The spec sheet allows installers to model these losses and optimize system design for maximum energy production. Considering these factors ensures long-term system reliability and performance, maximizing the return on investment for solar installations.

Warranty Details: Power Output and Product Defects

The Silfab 295 spec sheet PDF clearly outlines comprehensive warranty coverage, a key factor for long-term investment security. Silfab typically offers a 30-year linear power output warranty, guaranteeing a certain percentage of initial rated power over the module’s lifespan. This warranty assures minimal power degradation over time.

Alongside the power output warranty, a separate product warranty covers defects in materials and workmanship. This generally spans 12 years, protecting against manufacturing flaws that could impact performance or safety. The spec sheet details the claim process and conditions for both warranties.

Understanding these warranty terms is crucial for installers and customers. Silfab’s robust warranty demonstrates confidence in product quality and provides peace of mind, ensuring long-term system reliability and minimizing potential financial risks associated with solar investments.

Cell Technology: Monocrystalline vs. Polycrystalline (Silfab’s Approach)

The Silfab 295 spec sheet PDF highlights the company’s commitment to high-efficiency monocrystalline cell technology. Unlike polycrystalline cells, monocrystalline cells are cut from a single silicon crystal, resulting in greater purity and superior performance.

Silfab prioritizes monocrystalline cells for the SLA-X 295 series due to their higher energy conversion rates and improved temperature coefficients. This translates to increased power output, especially in varying weather conditions. The spec sheet details the cell’s efficiency rating, often exceeding 21.5%.

While polycrystalline cells are generally more affordable, Silfab focuses on maximizing long-term energy yield and system reliability. Their choice of monocrystalline technology reflects a dedication to premium quality and optimized performance, as evidenced by the detailed specifications within the PDF.

Bifacial Technology in Silfab 295 Modules

The Silfab 295 spec sheet PDF showcases the availability of bifacial technology in certain models, significantly enhancing energy production. Bifacial modules generate electricity from both the front and rear surfaces, capturing reflected light to boost overall output.

Silfab’s bifacial 295 modules utilize premium N-Type bifacial cells, achieving front efficiencies up to 21.5% and module efficiencies reaching 22.7%. The spec sheet details the increased power gain achievable with proper installation and reflective surfaces behind the panel.

This technology is particularly advantageous in installations with light-colored roofs or ground surfaces. The PDF provides data on rear-side gain, allowing for accurate energy yield estimations. Silfab optimizes these modules for larger roof spaces, maximizing energy harvest and return on investment, as clearly outlined in the documentation.

Certifications and Standards Compliance

The Silfab 295 spec sheet PDF meticulously details the module’s adherence to rigorous industry certifications and standards, ensuring quality and reliability. These certifications validate the module’s performance and safety for global installations.

Key certifications typically include IEC 61215 for photovoltaic module performance, IEC 61730 for safety, and UL 1703 for fire safety. The PDF explicitly lists these and other relevant standards met by the Silfab 295, providing assurance to installers and consumers.

Compliance with these standards demonstrates Silfab’s commitment to delivering high-quality products. The spec sheet serves as proof of testing and validation, crucial for project approvals and insurance requirements. This documentation confirms the module’s ability to withstand various environmental conditions and operate safely over its lifespan.

Applications: Residential, Commercial, and Community Solar

The Silfab 295 module, as detailed in its spec sheet PDF, demonstrates versatility across diverse solar applications, including residential rooftops, expansive commercial installations, and increasingly popular community solar projects.

Its efficient design and reliable performance make it suitable for homeowners seeking to reduce energy costs, businesses aiming for sustainability, and developers building shared solar facilities. The module’s power output and dimensions, outlined in the PDF, facilitate optimal system design for varying roof sizes and energy demands.

Silfab’s partnership with Pivot Energy highlights its commitment to community solar, leveraging the 295 module’s efficiency in projects benefiting multiple households. The spec sheet provides the technical data necessary for engineers and installers to confidently deploy these modules in any of these application scenarios, maximizing energy yield and return on investment.

Comparison with Competitor Modules (290-300W Range)

Analyzing the Silfab 295 spec sheet PDF reveals key differentiators when compared to competitor modules in the 290-300W power range; Silfab often utilizes high-efficiency monocrystalline cells, potentially yielding a higher power output per square foot than polycrystalline alternatives.

The spec sheet details superior temperature coefficients, indicating less power degradation in hotter climates – a crucial advantage. Furthermore, Silfab’s modules, particularly the bifacial versions, may offer increased energy production due to their ability to capture sunlight from both sides, a feature not universally available in competing products.

Warranty terms, as outlined in the PDF, are also a significant factor; Silfab provides a robust 30-year power output warranty. A detailed comparison of efficiency ratings, mechanical specifications, and warranty coverage, all found within the spec sheet, demonstrates Silfab’s competitive edge.

Where to Find the Official Silfab 295 Spec Sheet PDF

Locating the official Silfab 295 spec sheet PDF is crucial for accurate project planning and installation. The primary source is the Silfab Solar website, specifically within their product documentation or downloads section. A direct search on the Silfab website using keywords like “SLA-X 295 datasheet” or “Silfab 295 specifications” will yield the most current version.

Authorized Silfab distributors and installers often host these PDFs on their websites for easy access. Reputable solar industry resource websites and databases may also archive spec sheets, but verifying the document’s date is essential to ensure it’s the latest revision.

Beware of unofficial sources, as outdated or inaccurate information can lead to errors. Always prioritize downloading the PDF directly from Silfab Solar or a verified partner to guarantee you have the correct and complete technical details for the Silfab 295 module.

Pivot Energy Partnership and Community Solar Projects

Silfab Solar’s partnership with Pivot Energy signifies a commitment to expanding access to renewable energy through community solar initiatives across the United States. This multi-year collaboration leverages Silfab’s high-performance modules, including the SLA-X 295, to power community solar farms, benefiting local subscribers.

These projects allow individuals and businesses to participate in solar energy generation without the need for rooftop installations. Silfab’s efficient modules, detailed in their spec sheets, contribute to maximizing energy production within these shared solar facilities, lowering electricity costs for participants.

Pivot Energy’s expertise in developing and managing community solar projects, combined with Silfab’s reliable module technology, creates a synergistic approach to sustainable energy deployment. The Silfab 295’s specifications, including power output and efficiency, are key factors in optimizing the performance of these community-based solar installations.

Safety and Installation Considerations

The Silfab 295 spec sheet PDF emphasizes adherence to all applicable electrical codes and safety standards during installation. Proper grounding is critical, as detailed in the documentation, to prevent electrical hazards and ensure system longevity. Qualified installers should always consult the complete installation manual alongside the spec sheet.

Handling the modules requires care to avoid damage to the cells, which can impact performance. The spec sheet outlines recommended lifting and handling procedures. Furthermore, appropriate personal protective equipment (PPE), including gloves and eye protection, is essential during all phases of installation.

Roof mounting structures must be compatible with the Silfab 295’s dimensions and weight, as specified in the documentation. Regular inspections, as recommended in the spec sheet, are vital to identify and address any potential safety concerns or performance degradation over time, ensuring a safe and efficient solar system.

90 day keto meal plan pdf

A 90-day keto meal plan offers a structured approach to achieving weight loss and improved health through a low-carb, high-fat diet. This comprehensive guide provides detailed meal ideas, grocery lists, and tips to help you stay on track, ensuring a sustainable and enjoyable keto journey.

Overview of the Keto Diet

The ketogenic diet is a high-fat, low-carbohydrate eating plan designed to shift the body into ketosis, a metabolic state where fat is burned for energy instead of carbs. By drastically reducing carb intake (typically under 50g per day), the body adapts to using ketones, produced from fat breakdown, as its primary energy source. This diet emphasizes whole, nutrient-dense foods like meats, fish, eggs, healthy oils, and low-carb vegetables, while minimizing sugars, grains, and starchy foods. The keto diet is often used for weight loss, improved blood sugar control, and enhanced mental clarity, with many finding it sustainable for extended periods like 90 days.

Benefits of a 90-Day Keto Meal Plan

A 90-day keto meal plan offers numerous benefits, including significant weight loss, improved blood sugar control, and enhanced mental clarity. By following a structured plan, individuals can achieve ketosis more efficiently, leading to increased fat burning and energy levels. The extended duration allows the body to adapt fully, promoting long-term metabolic changes. Additionally, a 90-day plan helps break unhealthy eating habits and fosters a sustainable lifestyle change. Many users report reduced hunger and cravings, making it easier to stick with the diet. Overall, a 90-day keto meal plan is a powerful tool for those seeking lasting health and wellness benefits.

Importance of Meal Planning for Keto Success

Meal planning is crucial for keto success, ensuring adherence to the diet’s strict macronutrient requirements. A well-structured plan prevents carb overconsumption and maintains ketosis, while avoiding decision fatigue and unhealthy choices. It also saves time and money by organizing grocery shopping and meal prep. With a clear plan, individuals can balance fats, proteins, and carbs effectively, optimizing weight loss and health benefits. Consistency is key, and meal planning helps maintain discipline, reducing the risk of deviations. Ultimately, it transforms the keto diet from a temporary fix into a sustainable lifestyle, making long-term success achievable and stress-free.

Understanding the Keto Diet Basics

The keto diet is a high-fat, low-carb, moderate-protein diet that promotes ketosis, a metabolic state where the body burns fat for energy instead of carbs, aiding weight loss and improving health.

What is the Ketogenic Diet?

The ketogenic diet is a high-fat, low-carbohydrate, moderate-protein diet designed to shift the body into ketosis, a metabolic state where fat is the primary energy source. By drastically reducing carb intake, typically to less than 50 grams per day, the body depletes its glucose stores and begins breaking down fat into ketones for fuel. This process not only aids in weight loss but also improves blood sugar control and enhances mental clarity. The diet emphasizes whole, nutrient-dense foods like meats, fish, eggs, healthy oils, and low-carb vegetables, while minimizing sugars, grains, and starchy foods.

Macronutrient Breakdown: Fats, Proteins, and Carbs

The ketogenic diet focuses on a specific macronutrient breakdown: high fat (70-75% of daily calories), moderate protein (20-25%), and very low carbohydrates (5-10%). Fat becomes the primary energy source, while carbs are severely restricted to induce ketosis. Protein intake is kept moderate to avoid converting excess into glucose. Healthy fats like avocados, olive oil, and nuts are emphasized, while protein sources include meats, fish, and eggs. Carbs are limited to low-starch vegetables, nuts, and seeds, with a focus on net carbs (total carbs minus fiber). This balance ensures the body efficiently burns fat for fuel, promoting weight loss and metabolic health.

Phases of the Keto Diet

The ketogenic diet typically follows three distinct phases. The first phase, induction, focuses on rapidly entering ketosis by drastically reducing carb intake to 20-50 grams per day. This phase lasts about two weeks, kickstarting fat burning. The second phase, maintenance, allows for a slight increase in carbs (50-100 grams) while maintaining ketosis, continuing for several weeks or months. The final phase involves reintroducing higher-quality carbs, like whole grains and vegetables, to transition into a long-term, balanced low-carb lifestyle. Each phase is designed to promote fat loss, improve metabolic health, and ensure sustainability, aligning perfectly with a 90-day structured meal plan.

Preparing for the 90-Day Keto Meal Plan

Preparation is key to a successful keto journey. Start by meal prepping, removing unhealthy foods, and planning your meals. Stay committed and focused on your goals.

Setting Realistic Goals and Expectations

Setting realistic goals is crucial for a successful 90-day keto journey. Aim for gradual weight loss of 1-2 pounds per week. Focus on improving overall health, not just the scale. Define specific, measurable objectives, like increasing energy levels or reducing carb cravings. Track progress through photos, measurements, and health markers. Celebrate small victories to stay motivated. Understand that everyone’s journey is unique, and results may vary. Stay patient and committed, as the keto diet is a lifestyle change requiring dedication and persistence. Adjust goals as needed to maintain a sustainable and enjoyable path forward.

Stocking Your Keto Pantry

Stocking your keto pantry with essential items ensures you’re always ready to prepare delicious, low-carb meals. Start with healthy fats like avocado oil, coconut oil, and olive oil. Include high-quality protein sources such as grass-fed meats, wild-caught fish, and eggs. Low-carb vegetables like spinach, broccoli, and cauliflower should be staples. Don’t forget keto-friendly snacks like nuts, seeds, and cheese. Condiments such as sugar-free ketchup, mayo, and hot sauce add flavor without the carbs. Finally, incorporate keto-friendly sweeteners like stevia or erythritol for baking. Having these items on hand will make meal prep easier and help you stay on track throughout your 90-day plan.

Meal Prepping Tips for Sustainability

Meal prepping is crucial for sustaining a 90-day keto plan. Start by planning meals weekly, ensuring variety to avoid monotony. Dedicate one day, like Sunday, to prepare meals for the next few days. Use airtight containers to portion out breakfast, lunch, and dinner, making grab-and-go options easy. Label and date containers for organization. Incorporate freezer-friendly meals to extend prep duration. Keep snacks readily available to prevent impulsive choices. Rotate ingredients to maintain freshness and reduce waste. Focus on simple, repeatable recipes that fit your lifestyle. This structured approach ensures consistency, saving time and reducing the likelihood of deviating from your keto goals.

Weekly Meal Plan Structure

A well-organized weekly keto meal plan includes breakfast, lunch, dinner, and snacks, ensuring variety and macronutrient balance. Each day’s meals are carefully planned to promote consistency and motivation.

Breakfast Ideas for Each Week

Keto breakfasts are both delicious and satisfying, focusing on high-fat, low-carb ingredients. Week 1 might feature keto oatmeal or scrambled eggs with avocado. Week 2 could include keto pancakes made with almond flour or a spinach and feta omelette. Week 3 might introduce breakfast skillets with ground beef and veggies, while Week 4 could offer keto smoothies with protein powder and healthy fats. Each week’s breakfast ideas are designed to keep meals exciting and varied, ensuring you stay motivated and nourished throughout your 90-day journey. These recipes are balanced, flavorful, and tailored to meet your macronutrient needs.

Lunch and Dinner Recipes

Keto lunch and dinner recipes are designed to be flavorful and nutritious, focusing on high-fat, low-carb ingredients. Lunch options might include keto Cobb salads, tuna lettuce wraps, or zucchini boats stuffed with ground beef. Dinners could feature balsamic-glazed salmon, cauliflower mash with roasted chicken, or beef stir-fries with low-carb vegetables. These meals are balanced to meet macronutrient goals, ensuring satisfaction and energy. Recipes are varied to prevent boredom, with creative twists on classic dishes. Each meal plan includes detailed instructions, making it easy to prepare delicious, keto-friendly meals that support your weight loss and health goals throughout the 90-day journey.

Snack Options to Stay on Track

Keto-friendly snacks are essential for maintaining energy and curbing cravings throughout the day. Popular options include nuts like almonds and macadamias, cheese sticks, hard-boiled eggs, and low-carb veggies with dip. For sweet cravings, keto fat bombs or sugar-free chocolate can satisfy without breaking the diet. Snacks like pork rinds, kale chips, or cucumber slices with avocado are also great choices. Portion control is key to staying within macronutrient goals. Prepping snacks in advance ensures you always have healthy options available, making it easier to stick to your keto plan and avoid temptation. These snacks keep you fueled and focused during your 90-day journey.

Grocery Shopping and Budgeting

Plan your keto grocery list to include essential items like meats, cheeses, and healthy fats. Buy in bulk and avoid processed foods to stay within budget.

Essential Keto Foods to Buy

Stock your pantry with high-fat foods like avocados, olive oil, and coconut oil. Include grass-fed meats, wild-caught fish, and full-fat cheeses. Low-carb vegetables such as spinach, broccoli, and cauliflower are must-haves. Nuts and seeds like almonds and chia seeds provide healthy fats. Eggs, butter, and cream are versatile for cooking. Avoid processed foods and opt for whole, nutrient-dense options. Plan your grocery list to ensure you have enough protein, healthy fats, and low-carb vegetables to sustain your 90-day keto journey. This will help you stay on track and enjoy delicious, satisfying meals while maintaining a budget-friendly approach to keto shopping.

Budget-Friendly Keto Shopping Tips

Plan meals around seasonal, affordable ingredients to reduce costs. Buy in bulk for items like nuts, seeds, and oils. Opt for cheaper cuts of meat, which become tender with slow cooking. Shop for frozen vegetables, as they are often cheaper than fresh and equally nutritious. Avoid processed keto products, which can be expensive. Use coupons, shop sales, and compare prices to maximize savings. Consider purchasing eggs, cheese, and meats in larger quantities to lower per-unit costs. Prioritize whole foods over pre-packaged options to stay within budget while maintaining a keto lifestyle. This approach ensures affordability without compromising on nutrition or flavor.

Meal Planning Tools and Resources

Utilize downloadable PDF guides for structured 90-day keto meal plans, offering recipes and grocery lists. Online meal plan generators can customize options based on preferences and dietary needs. Apps like MyFitnessPal and KetoDiet help track macros and plan meals efficiently. Websites provide free resources, including sample meal plans and shopping tips. Social media groups and forums offer community support and recipe ideas. Printable templates and spreadsheets can organize weekly meals and budgets. These tools ensure consistency, variety, and accountability, making the keto journey manageable and sustainable over 90 days. They also provide motivation and practical solutions for maintaining a keto lifestyle effectively.

Common Challenges and Solutions

Challenges like keto flu, cravings, and social pressures can arise. Staying hydrated, replenishing electrolytes, and meal prepping help alleviate symptoms. Community support and structured plans maintain motivation and adherence to the 90-day keto meal plan.

Overcoming Keto Flu and Other Side Effects

The keto flu, characterized by fatigue, headaches, and nausea, is a common side effect when starting the ketogenic diet. To alleviate symptoms, stay hydrated by drinking plenty of water and replenish electrolytes with foods rich in sodium, potassium, and magnesium. Gradually transitioning into ketosis by reducing carbs slowly can also help minimize discomfort. Incorporating broth or supplements may ease symptoms. A well-structured 90-day keto meal plan ensures balanced nutrition, reducing the risk of deficiencies. Additionally, meal prepping and community support can help maintain motivation and adherence, making the transition smoother and more sustainable for long-term success.

Staying Motivated Throughout the 90 Days

Maintaining motivation during a 90-day keto journey requires setting clear, achievable goals and celebrating small victories. Tracking progress through weight loss, improved health markers, and increased energy levels can reinforce commitment. Meal prepping and exploring new recipes keep the diet exciting and prevent boredom. Joining keto communities or finding a support partner provides encouragement and accountability. Rewarding milestones with non-scale victories, like new clothes or fitness achievements, boosts morale. Staying informed and educated about the benefits of the keto lifestyle helps maintain focus and determination, ensuring a successful and sustainable transformation over the 90-day period.

Handling Social and Emotional Eating Triggers

Social gatherings and emotional stress often lead to eating triggers, challenging keto adherence. Preparing keto-friendly alternatives for events ensures compliance without feeling deprived. Identifying emotional triggers, like stress or boredom, and substituting eating with activities such as walking or meditation helps maintain focus. Communicating dietary choices to friends and family fosters support and reduces pressure. Planning meals in advance and having healthy snacks on hand prevents impulsive choices. Building a strong mindset and understanding that setbacks are temporary aids in overcoming these challenges, ensuring long-term success on the 90-day keto journey.

Tracking Progress and Adjustments

Regularly monitor weight loss, ketosis levels, and health markers to assess progress. Adjust macronutrient ratios and meal portions as needed to maintain ketosis and achieve desired results.

Monitoring Weight Loss and Health Markers

Regularly tracking weight loss and health markers is crucial for assessing progress on the 90-day keto meal plan. Monitor metrics like weight, body fat percentage, and ketosis levels to ensure you’re meeting goals. Additionally, track blood glucose, lipid profiles, and energy levels to gauge overall health improvements. Use a food diary or mobile app to log meals and macros, helping identify patterns and potential stalls. Weekly weigh-ins and progress photos can also provide visual motivation. By consistently monitoring these markers, you can make informed adjustments to your diet and lifestyle, ensuring long-term success and optimal health outcomes on your keto journey.

Adjusting Macronutrients for Optimal Results

Adjusting macronutrients is key to achieving optimal results on the 90-day keto meal plan. Aim for a balance of 70-75% fats, 20-25% protein, and 5-10% carbs. Monitor ketosis levels to ensure you’re in the fat-burning zone. If weight loss stalls, consider reducing protein or adjusting carb intake. Track your macronutrient ratios daily using a food diary or app. Fine-tune portion sizes based on progress, and consult a nutritionist for personalized adjustments. Regularly assess how your body responds to different macro balances, ensuring sustained energy and fat loss. This tailored approach will help maximize the effectiveness of your keto journey and keep you on track for long-term success.

When and How to Reintroduce Carbs

Reintroducing carbs after a 90-day keto plan should be done gradually to avoid metabolic shock. Start with small portions of low-carb, nutrient-dense foods like vegetables or whole grains. Monitor your body’s response, ensuring ketosis isn’t disrupted. Adjust carb intake based on health markers and weight loss goals. This phased approach helps transition to a more balanced diet while maintaining keto benefits. Always prioritize whole, unprocessed foods to avoid spikes in blood sugar. Tracking progress and adjusting portions carefully ensures a smooth transition and long-term success. This step is crucial for sustaining a healthy lifestyle beyond the initial 90-day period.

Final Thoughts and Next Steps

Completing a 90-day keto meal plan is a significant achievement. Celebrate your progress, and consider maintaining a keto lifestyle or gradually reintroducing carbs. Continuous learning and adaptation will help you sustain long-term health benefits and weight management. Set new goals and explore new recipes to keep your journey exciting and fulfilling. Remember, consistency and patience are key to lasting success.

Maintaining a Keto Lifestyle Beyond 90 Days

Maintaining a keto lifestyle beyond 90 days requires commitment and adaptability. Focus on sustainable habits, such as meal prepping, budget-friendly shopping, and exploring new recipes. Continuously educate yourself on keto-friendly foods and portion control to avoid plateaus. Incorporate physical activity and monitor health markers to ensure long-term success. Stay connected with keto communities for support and inspiration. Remember, keto is not just a diet but a lifestyle change that promotes overall well-being. By staying consistent and open to adjustments, you can enjoy the benefits of ketosis, improved energy, and better health for years to come. Celebrate small victories and keep moving forward.

Continuous Learning and Adaptation

Continuous learning and adaptation are crucial for long-term keto success. As you progress, explore new recipes and adjust your macronutrient ratios to avoid plateaus. Stay informed about keto-friendly foods, portion sizes, and meal prepping techniques to maintain variety. Adapt your diet based on health markers, energy levels, and weight loss goals. Incorporate budget-friendly shopping tips and utilize meal planning tools to simplify your journey. Embrace the phases of keto, from ketosis to carb reintroduction, ensuring a balanced approach. By continuously learning and adapting, you can tailor the keto lifestyle to your needs, making it sustainable and enjoyable for the long haul.

Celebrating Achievements and Setting New Goals

Celebrating milestones, like completing 30, 60, or 90 days on the keto diet, is essential to stay motivated. Acknowledge your progress, whether it’s weight loss, improved health markers, or increased energy. Use these achievements to set new, realistic goals, such as exploring new keto recipes or reintroducing carbs mindfully. Track your journey through photos, measurements, or a journal to visualize your success. Reward yourself with non-food treats, like new workout gear or a spa day. Continuous celebration and goal-setting help maintain motivation and reinforce the keto lifestyle as a long-term commitment to health and well-being.

how do i add arrows to a pdf

Adding arrows to PDFs enhances document clarity and engagement. Use tools like Smallpdf or Adobe Acrobat to annotate and highlight key points effectively.

Overview of Adding Arrows to PDFs

Adding arrows to PDFs is a straightforward process using various tools. Online platforms like Smallpdf and desktop applications like Adobe Acrobat offer annotation features. Free PDF viewers also provide basic arrow tools. These tools allow users to highlight important sections, create visual guides, or emphasize specific details. Arrows can be customized in style, color, and thickness to suit different needs. Whether for professional documents or personal use, adding arrows enhances clarity and engagement. Experiment with different tools to find the one that best fits your workflow and requirements.

Importance of Using Arrows in PDFs

Arrows in PDFs are essential for emphasizing key points, guiding attention, and enhancing document clarity. They help highlight important sections, making complex information easier to understand. Arrows are particularly useful in instructional materials, presentations, and technical documents. They can also improve navigation within multi-page PDFs. By drawing attention to specific areas, arrows ensure that readers focus on critical details. This visual tool is versatile and enhances both professional and personal documents, making communication more effective and engaging for the audience.

  • Enhance clarity and focus.
  • Guide readers through complex information.
  • Highlight key points effectively.

Popular Tools for Adding Arrows to PDFs

Several tools simplify adding arrows to PDFs, catering to different needs. Smallpdf and Adobe Acrobat are top choices, offering intuitive annotation features. Free PDF viewers like Adobe Reader also provide basic arrow tools. Online platforms and screenshot tools are alternative options for quick annotations. These tools vary in functionality, from basic drawing to advanced customization, ensuring users can choose the one that best fits their requirements. They make annotating PDFs efficient and accessible for both professionals and casual users.

  • Smallpdf
  • Adobe Acrobat
  • Free PDF viewers
  • Online platforms
  • Screenshot tools

Method 1: Using Smallpdf PDF Annotator

  1. Open Smallpdf PDF Annotator and upload your PDF.
  2. Select the Draw or Pencil tool from the toolbar.
  3. Choose the arrow option and draw arrows where needed.
  4. Save and download your annotated PDF.

Step 1: Open Smallpdf PDF Annotator

To begin, visit the Smallpdf website and select the PDF Annotator tool from the menu. Upload your PDF file by dragging and dropping it or using the file selection option. Once uploaded, the PDF will open in the Smallpdf editor, displaying a user-friendly interface with various annotation tools. Ensure you have a stable internet connection for smooth operation. This step sets the stage for adding arrows and other annotations to your document efficiently.

Step 2: Select the Draw or Pencil Tool

After opening your PDF in Smallpdf Annotator, locate the toolbar at the top of the screen. Click on the Draw or Pencil tool to activate the drawing mode. From the dropdown menu, select the Arrow icon to access the arrow drawing feature. This tool allows you to create straight or curved arrows. Adjust the thickness and color settings as needed before proceeding. Once selected, you’re ready to add arrows to your PDF document with precision and clarity.

Step 3: Add Arrows to Your PDF

With the arrow tool selected, click and drag your mouse across the PDF to draw an arrow. You can create straight or curved arrows depending on your needs. To customize, adjust the thickness and color of the arrow using the toolbar options. Arrows can be resized or repositioned by dragging their endpoints. Once placed, arrows will remain editable, allowing you to fine-tune their appearance. Ensure your annotations are clear and serve their intended purpose before finalizing your document.

Step 4: Save and Download Your PDF

After adding arrows, click the Save button to ensure your annotations are preserved. Depending on the tool, you may need to select File > Save or use a dedicated save icon. Once saved, navigate to the Download option to export your PDF. Choose a location on your device and select a file format, typically PDF. Your document will be saved with arrows included. Ensure your browser allows downloads and check your default download folder if the file doesn’t appear immediately.

Method 2: Using Adobe Acrobat

Adobe Acrobat offers robust tools for adding arrows to PDFs. Access drawing tools, select the arrow option, draw, and save your annotated document securely.

Accessing the Drawing Tools in Adobe Acrobat

To access the drawing tools in Adobe Acrobat, navigate to the Comment or Tools menu. Select Draw or Annotate to reveal the toolbar. Choose the Arrow tool from the options provided. This allows you to create clear directional indicators in your PDF. Ensure the tool is selected before drawing arrows for precise annotations.

Selecting the Arrow Tool

In Adobe Acrobat, after accessing the drawing tools, locate the Arrow tool in the toolbar. It may appear under a dropdown menu labeled Draw or Annotate. Click on the Arrow icon to select it. Some versions may require you to hover over the Pencil tool to reveal the Arrow option. Once selected, the cursor will change, indicating you’re ready to draw arrows. You can customize the arrow’s color and thickness before drawing for a polished look.

Drawing Arrows in Your PDF

With the Arrow tool selected, click and drag your mouse across the PDF where you want the arrow to appear. Hold the Shift key for a straight line. Release to create the arrow. You can customize its color and thickness in the toolbar. To adjust, click the arrow and drag its endpoints. For multiple arrows, repeat the process. Ensure the arrow is placed accurately, as it cannot be edited after creation; This feature is ideal for highlighting key points or indicating flow in diagrams. Save your work to preserve the annotations.

Saving Your Annotated PDF

After adding arrows, go to the File menu and select Save As. Choose a location and name your file. Ensure the format remains PDF to preserve annotations. Click Save to finalize. Your document, including arrows, will be saved. If using an online tool, look for a Download button. Always verify that arrows are visible in the saved file. This step ensures your annotations are retained for future use or sharing. The process is straightforward and maintains the integrity of your work.

Method 3: Using Free PDF Viewers

Open your PDF in a free viewer like Adobe Reader. Locate the arrow tool under annotations or drawing tools. Draw arrows as needed and save the file.

Opening Your PDF in a Free Viewer

Download and install a free PDF viewer like Adobe Reader, Foxit Reader, or SumatraPDF. Open your PDF file by selecting “File” > “Open” and choosing your document. Once loaded, navigate to the annotation or drawing tools section, typically found in the toolbar or under the “View” menu. Select the arrow tool to begin adding annotations. Ensure your viewer supports editing features, as some free tools may have limitations. If not, consider upgrading to a paid version or using an alternative method.

Locating the Arrow Tool

To locate the arrow tool in a free PDF viewer, navigate to the toolbar or menu bar. Look for options like “Comment,” “Draw,” or “Annotations.” Select “Tools” or “Drawing Tools” to find the arrow icon, often labeled as “Arrow Tool” or “Line/Arrow Tool.” Some viewers may require you to click and hold the pencil or line tool to reveal the arrow option. Once found, select it to activate the arrow drawing feature. Ensure the tool is visible and accessible before proceeding to add arrows to your document.

Adding Arrows to Your Document

Once the arrow tool is selected, click and drag your mouse across the document to draw an arrow. You can customize its style, color, and thickness using the toolbar options. To ensure accuracy, zoom in on the area where the arrow is needed. After placing the arrow, you can adjust its position by dragging its endpoints. For multiple arrows, repeat the process. Arrows can also be combined with text annotations for clearer explanations. Save your document to retain all changes.

Exporting the Final PDF

After adding arrows and annotations, go to the “File” menu and select “Export” or “Save As” to save your document. Choose a location and ensure the file format is set to PDF. Some tools may offer additional options like “Save with Annotations” to preserve your arrows. Name your file appropriately and click “Save.” Your PDF is now ready to share or use. Ensure all annotations are visible in the exported file by previewing it in a PDF viewer before finalizing.

Other Tools and Methods

Beyond dedicated PDF editors, online platforms, the Snipping Tool, and screenshot tools like Snagit offer quick solutions for adding arrows to documents without installing additional software.

Using Online Platforms for Adding Arrows

Online platforms like Smallpdf and Sejda offer user-friendly interfaces to add arrows to PDFs. Simply upload your document, select the arrow tool, and draw directly on the page. These tools often provide customization options, such as color and thickness, to enhance your annotations. Many platforms are free or offer trial versions, making them accessible for quick edits without installing software. They are ideal for users seeking convenience and efficiency in annotating PDFs remotely.

Utilizing the Snipping Tool for Arrow Annotations

The Snipping Tool, a built-in Windows utility, allows users to capture and annotate screenshots. While primarily for images, it can help create arrow annotations for PDFs. Capture the relevant PDF section, then use the tool’s drawing features to add arrows. However, this method doesn’t directly edit the PDF; the annotated image must be inserted back into the document using other software. It’s a free, straightforward option for basic annotations, though limited compared to dedicated PDF editors.

Adding Arrows via Screenshot Tools

Screenshot tools like Snagit or Lightshot can help add arrows to PDFs indirectly; Capture the desired section, then use the tool’s annotation features to draw arrows. While this method doesn’t edit the PDF directly, the annotated image can be inserted back into the document. It’s a handy option for quick annotations, especially when advanced PDF editors aren’t available. However, it may require additional steps to integrate the image into the original file, making it less efficient for complex or multiple annotations.

Advanced Features

Customize arrow styles, adjust thickness and color, and add text annotations for enhanced clarity. These features ensure professional and precise document annotations, improving overall readability and impact.

Customizing Arrow Styles

Customizing arrow styles enhances document clarity. Users can modify arrowheads, tails, and colors to suit their needs. Adjusting line thickness and opacity ensures visibility. Many tools offer predefined styles, while others allow creating custom designs. These options enable precise annotations, making documents more professional and visually appealing. By tailoring arrow styles, users can emphasize specific points effectively, ensuring clear communication and engagement. This feature is particularly useful for technical drawings, presentations, and detailed explanations, where visual accuracy is crucial.

Adjusting Arrow Thickness and Color

Adjusting arrow thickness and color enhances visibility and emphasis. Most tools allow selecting from predefined colors or customizing hues using hex codes. Thickness can be fine-tuned to ensure arrows stand out without overwhelming the content. Thicker lines are ideal for highlighting key points, while thinner lines blend seamlessly. Color options enable consistency with document themes or personal preferences. These adjustments ensure arrows are both functional and aesthetically pleasing, making annotations clear and professional. Proper customization enhances readability and visual appeal in PDF documents.

Adding Text Annotations with Arrows

Combining text with arrows in PDFs improves clarity and emphasis. Select the arrow tool, draw the arrow, then add text using the text annotation feature. Ensure the arrow points directly to the relevant content. Adjust font size, color, and style to match your document’s theme. This method is ideal for providing context or explanations alongside visual cues. Proper alignment and formatting ensure readability and professional presentation, making annotations effective for feedback, instructions, or highlighting key information in PDF documents.

Troubleshooting

Common issues include arrow tools not appearing or misaligned arrows. Restarting the tool, checking settings, and ensuring proper PDF editing permissions often resolve these problems quickly.

Common Issues When Adding Arrows

Users often face issues like the arrow tool not appearing, arrows misaligning, or drawing tools malfunctioning. These problems can arise from outdated software, incorrect tool selection, or limited features in free PDF viewers. Additionally, some tools may not support arrow annotations, leading to frustration. To resolve these, ensure your software is up-to-date, restart the application, and verify that the correct drawing tools are enabled. If issues persist, consider using paid versions of Adobe Acrobat or Smallpdf for more reliable annotation features.

Resolving Arrow Tool Not Showing Up

If the arrow tool isn’t visible, restart your PDF editor or check if the drawing tools are enabled. Ensure you’re using the correct annotation mode, as some viewers hide advanced tools by default. Update your software to the latest version, as outdated programs may lack arrow functionality. For Adobe Acrobat, navigate to the “Comment” or “Drawing” toolbar and enable it from the menu. In free viewers, verify that the arrow tool is available and not restricted to paid versions. Restarting the application often resolves temporary glitches.

Fixing Arrow Placement Errors

If arrows appear misaligned or in the wrong location, zoom in to adjust their position precisely. Use the undo feature to remove misplaced arrows and redraw them. Ensure the arrow tool is selected correctly and not hidden behind other tools. Check if gridlines or alignment guides are enabled to help position arrows accurately. If issues persist, restart your PDF editor or reset the tool settings to default. Using the arrow tool’s properties, adjust the start and end points manually for better placement.

Adding arrows to PDFs is straightforward with tools like Smallpdf, Adobe Acrobat, or free viewers. Customize styles, troubleshoot issues, and enhance document clarity efficiently with these methods.

Various tools like Smallpdf, Adobe Acrobat, and free PDF viewers offer straightforward ways to add arrows. Use the draw tool in Smallpdf, select the arrow icon in Acrobat, or locate annotation features in free viewers. Each method allows you to customize arrow styles, adjust thickness, and position them accurately. Troubleshooting common issues ensures arrows display correctly. By following these steps, you can enhance your PDFs with clear, professional annotations tailored to your needs.

Best Practices for Adding Arrows

For clear and effective annotations, use high-contrast colors to ensure arrows stand out. Keep arrows simple and avoid clutter by placing them near relevant content. Use consistent styles across documents for professionalism. Save your PDF in the correct format to preserve annotations. Test arrows on different devices to ensure visibility. Regularly update your tools for the latest features. By following these practices, you can create precise, visually appealing annotations that enhance understanding and maintain document integrity.

Final Tips for Effective PDF Annotation

Ensure arrows are clear and concise, avoiding unnecessary complexity. Use high-contrast colors to make annotations stand out. Regularly save your work to prevent data loss. Test annotations on multiple devices for consistency. Update your tools periodically for improved features. Combine arrows with text for enhanced communication. Organize annotations using color-coding or layers. Review your document before sharing to ensure accuracy. By following these tips, you can create professional, effective, and visually appealing PDF annotations that convey your message clearly.

litany of the divine child jesus pdf

The Litany of the Divine Child Jesus is a beautiful Catholic prayer invoking the Infant Jesus, seeking mercy and grace. It offers a heartfelt way to deepen devotion and spiritual reflection, available as a free PDF for personal or family use.

Significance of the Litany in Catholic Devotion

The Litany of the Divine Child Jesus holds profound significance in Catholic devotion, offering a powerful means to invoke the Infant Jesus’s mercy and grace. It serves as a heartfelt prayer to seek divine intervention, fostering trust in God’s plan and providing emotional healing. This litany is particularly cherished for its ability to deepen spiritual growth and devotion, making it a cherished tool for personal and family prayer. Its structure, rich in petitions and reflections, allows believers to connect deeply with the divine child’s life and mission. By reciting this litany, Catholics express their faith and humility, seeking strength and comfort in times of need.

Overview of the Litany’s Structure and Content

The Litany of the Divine Child Jesus is structured to guide devotees through a series of invocations and petitions, seeking mercy and grace. It begins with an invocation to the Infant Jesus, followed by specific requests for deliverance from sin and enslavement. The litany includes phrases like “Have mercy on us” and “Graciously hear us,” emphasizing humility and trust. Key themes such as the gift of salvation, the restoration of humanity, and the triumph over Satan are woven throughout. The litany concludes with a final blessing, reinforcing its purpose as a tool for spiritual reflection and devotion. Its content is designed to deepen faith and provide comfort through heartfelt prayer.

Historical Background of the Litany

The Litany of the Divine Child Jesus traces its roots in Catholic tradition, evolving over centuries as a devotional prayer seeking mercy and grace through the Infant Jesus.

Origins of the Litany of the Divine Child Jesus

The Litany of the Divine Child Jesus originates from traditional Catholic devotional practices, focusing on the Infant Jesus’s life and divine mission. It draws inspiration from biblical events, such as the Nativity and Epiphany, and emphasizes themes of mercy, salvation, and trust in God’s plan. The litany is structured to invoke the Infant Jesus’s intercession, with specific petitions and reflections on His childhood. Its origins are deeply rooted in the Church’s veneration of the Holy Child, making it a cherished prayer for spiritual growth and family devotion. The litany’s widespread use is enhanced by its availability in PDF format, facilitating personal and communal recitation.

Development of the Litany Through the Centuries

The Litany of the Divine Child Jesus has evolved over centuries, rooted in Catholic devotion to the Infant Jesus. Its early forms emerged from traditional prayers and hymns honoring the Holy Child, reflecting themes of mercy and salvation. Over time, the litany was refined and expanded, incorporating elements from various Catholic communities and saints; The prayer gained popularity in the Middle Ages, particularly in Europe, where devotion to the Infant Jesus flourished. Its structure and content were influenced by the Church’s liturgical traditions and the contributions of mystics and theologians. Today, the litany remains a vibrant prayer, adapted into multiple languages and formats, including PDF, ensuring its accessibility for modern devotion and reflection.

Key Contributors to the Litany’s Formation

The Litany of the Divine Child Jesus has been shaped by numerous devout Catholics throughout history. Saints like St. Therese of Lisieux and St. Anthony of Padua inspired its themes of mercy and trust in God. Mystics and theologians contributed to its theological depth, while anonymous devotees added heartfelt petitions. Modern authors and prayer communities have adapted the litany, ensuring its relevance for contemporary spirituality. Their collective efforts have transformed it into a powerful prayer tool, now widely available in PDF formats for global devotion. These contributors’ dedication reflects the enduring appeal of the Infant Jesus as a symbol of hope and salvation.

Structure of the Litany

The Litany of the Divine Child Jesus begins with an invocation, followed by specific petitions for mercy and grace, and concludes with a final blessing, creating a harmonious flow from praise to supplication and divine assurance.

Invocation and Opening Prayers

The Invocation and Opening Prayers of the Litany of the Divine Child Jesus are heartfelt expressions of devotion, beginning with a call to the Infant Jesus for mercy and grace. These prayers set the tone for the litany, inviting worshippers to reflect on the divine love and humility of the Child Jesus. The opening often includes petitions such as, “O Divine Child Jesus, I come before You, moved by love and hope,” and “We pray to Thee, Heavenly Father, Who for the Infant Jesus’ sake adopted us as Thy children.” These prayers emphasize trust in God’s plan and the gift of salvation through the Divine Child, creating a spiritual foundation for the rest of the litany.

Specific Petitions and Requests for Mercy

The Specific Petitions and Requests for Mercy in the Litany of the Divine Child Jesus are heartfelt appeals to the Infant Jesus, seeking divine intervention and compassion. These prayers often follow a traditional litany format, with a leader reciting a petition and the congregation responding with phrases like “Have mercy on us” or “Graciously hear us.” Petitions include requests such as “From the slavery of the children of Adam, Infant Jesus, deliver us” and “Be merciful, spare us, O Infant Jesus.” These prayers emphasize themes of deliverance, salvation, and trust in the Infant Jesus’ divine power to grant mercy and healing. They are deeply personal and reflective, inviting worshippers to seek spiritual and emotional relief through the Divine Child’s intercession.

The Conclusion and Final Blessing of the Litany of the Divine Child Jesus serve as a powerful culmination of the prayer, reinforcing trust in God’s divine plan. The litany ends with a heartfelt request for eternal grace and the joy of adoring Jesus alongside Mary and Joseph. The final blessing often invokes the Infant Jesus’ mercy, offering comfort and hope to those seeking spiritual solace. This section emphasizes surrendering to God’s will and finding peace in His providence. The litany’s conclusion leaves the faithful with a renewed sense of devotion and a deeper connection to the Divine Child, fostering spiritual growth and emotional healing through its merciful intercession.

Key Themes in the Litany

The litany emphasizes the mercy of the Infant Jesus, the gift of salvation, and the importance of trust in the divine plan, fostering devotion and spiritual reflection.

The Mercy of the Infant Jesus

The mercy of the Infant Jesus is a central theme in the litany, reflecting His compassionate nature. Prayers like “Be merciful, spare us, O Infant Jesus” and “Be merciful, graciously hear us, O Infant Jesus” highlight this theme. These petitions seek divine pardon and grace, emphasizing trust in Jesus’ loving kindness. The litany also invokes His mercy to deliver humanity from sin and its consequences, such as “From the slavery of the children of Adam, Infant Jesus, deliver us.” This focus on mercy encourages believers to approach the Divine Child with humility and confidence, seeking spiritual healing and comfort through His boundless compassion.

The Gift of Salvation Through the Divine Child

The gift of salvation is a profound theme in the litany, emphasizing the Infant Jesus’ role as the Redeemer. Prayers like “Through Thy most glorious Epiphany” and “Through Thy most pious Presentation” highlight His divine mission to restore humanity. The litany invokes the Infant Jesus as the “Gift of salvation” and “Restoration of humanity,” underscoring His sacrifice for mankind’s redemption. Believers are reminded of the unearned fortune of salvation through the Divine Child, encouraging trust in His plan. This theme inspires hope and gratitude, inviting devotees to reflect on the Infant Jesus’ role in their spiritual journey toward eternal life and union with God.

The Role of Trust in the Divine Plan

Trust in the divine plan is a central theme in the litany, encouraging believers to surrender to God’s will. Prayers like “Through Thy most painful Circumcision” and “I trust in You” reflect this surrender. The litany emphasizes trusting in the Infant Jesus’ mercy and divine providence, even in life’s challenges. It invites devotees to embrace humility and trust, as seen in phrases like “humiliation is good for the soul.” This trust fosters spiritual growth, guiding believers to rely on God’s plan and find comfort in His love. The litany thus becomes a powerful tool for deepening faith and trusting in the divine plan, leading to inner peace and closer union with God.

Benefits of Reciting the Litany

Reciting the litany fosters spiritual growth, emotional healing, and trust in God’s plan, offering comfort, peace, and solace through deep devotion to the Infant Jesus.

Spiritual Growth and Devotion

Reciting the Litany of the Divine Child Jesus nurtures spiritual growth by fostering a deeper connection with the Infant Jesus, encouraging trust in God’s plan and humility. It invites believers to reflect on the divine life of Jesus, from His poverty to His redemptive mission, inspiring devotion and a heart of gratitude. Through this prayer, individuals can experience emotional healing and comfort, finding solace in the mercy and love of the Divine Child. The litany also serves as a powerful tool for personal and family prayer, strengthening faith and drawing families closer to God. Its rhythmic structure makes it accessible for all to adore and seek refuge in Jesus.

Emotional Healing and Comfort

The Litany of the Divine Child Jesus offers profound emotional healing and comfort, especially in times of sorrow or struggle. By invoking the Infant Jesus’s mercy, believers find solace in His loving presence. The litany’s heartfelt petitions, such as “Be merciful, spare us, O Infant Jesus,” create a sense of trust in God’s plan, fostering inner peace. This prayer also encourages humility and surrender, helping individuals release burdens and embrace divine consolation. Many have found emotional relief through its recitation, experiencing a deeper connection to Jesus’s compassionate heart. It serves as a powerful tool for healing, reminding us of God’s infinite love and grace.

How to Use the Litany of the Divine Child Jesus PDF

Download the PDF, print it, and use it for personal or family prayer. Reflect on each invocation, seeking mercy and grace. Ideal for devotion and comfort.

Downloading and Accessing the PDF

Accessing the Litany of the Divine Child Jesus PDF is straightforward. It is available for free download online in various formats, including Word Doc, PDF, and Text File. Simply search for “Litany of the Divine Child Jesus PDF” and select a reliable source. Once downloaded, you can print it for personal or family use, making it easy to incorporate into daily prayer routines. The PDF serves as a convenient guide for reflection and devotion, allowing users to deepen their spiritual connection with the Infant Jesus. Its portability ensures that the litany can be accessed anytime, anywhere, fostering a consistent prayer practice.

Guidelines for Recitation and Reflection

Reciting the Litany of the Divine Child Jesus is a meaningful way to deepen devotion. Begin by finding a quiet, prayerful space to focus on the words. Read the litany slowly, reflecting on each invocation and petition. It is ideal to pray with sincerity, asking for mercy and grace through the Infant Jesus. The litany can be recited individually or with family, fostering unity and spiritual growth. Consider incorporating it into daily prayer routines or during special occasions. Use the PDF as a guide, pausing after each section to meditate on the divine attributes and blessings. This practice nurtures a deeper connection with the Divine Child, fostering trust and hope in His plan.

Cultural and Devotional Impact

The Litany of the Divine Child Jesus holds deep cultural and devotional significance, fostering a sense of community and faith among Catholics worldwide. Its widespread popularity endures through its heartfelt prayers and accessibility in PDF format, making it a cherished resource for personal and family devotion.

Popularity in Catholic Communities

The Litany of the Divine Child Jesus has gained significant popularity in Catholic communities worldwide, offering a profound way to connect with the Infant Jesus. Its heartfelt prayers resonate deeply, fostering a sense of devotion and unity among believers. Many Catholics incorporate this litany into their daily or family prayers, finding comfort and spiritual strength in its words. The availability of the litany in PDF format has further enhanced its accessibility, allowing individuals and families to easily download and use it for personal reflection or communal worship. This widespread embrace highlights its enduring relevance and the deep emotional connection it fosters within the Catholic faith community.

Use in Family and Personal Prayer

The Litany of the Divine Child Jesus is widely used in both family and personal prayer, offering a meaningful way to deepen spiritual connection. Families often recite it together, fostering unity and devotion, while individuals use it for personal reflection and comfort. The PDF format makes it easily accessible, allowing believers to incorporate it into their daily routines or special occasions. Many find solace in its heartfelt petitions, which emphasize trust in the Infant Jesus and seek His mercy. This litany is particularly cherished for its ability to bring families closer to God and to one another, while also nurturing personal faith and emotional healing through its beautiful and reverent language.

The Litany of the Divine Child Jesus is a powerful prayer that deepens devotion and offers comfort. Its timeless beauty and accessibility make it a cherished tool for spiritual growth and reflection, fostering a closer connection to the Infant Jesus and His divine mercy.

Final Thoughts on the Litany’s Importance

The Litany of the Divine Child Jesus holds profound significance as a prayer that nurtures devotion and trust in God’s plan. By invoking the Infant Jesus, it offers comfort, mercy, and spiritual renewal. Its accessibility in PDF format makes it a convenient tool for personal and family prayer, fostering a deeper connection to the divine. This litany not only strengthens faith but also provides solace in times of need, reminding believers of the gift of salvation through the Divine Child. Its timeless appeal lies in its ability to inspire hope and trust, making it a cherished resource for Catholics seeking spiritual growth and emotional healing.

Additional Resources

Discover more about the Litany of the Divine Child Jesus with recommended prayer books and guides. Explore related litanies like the Miraculous Infant of Prague for deeper devotion.

Recommended Reading and Prayers

Enhance your devotion with the Litany of the Divine Child Jesus by exploring complementary prayers and books. The Family Healing Prayer Book, co-authored by Ashley Blackburn, offers powerful intercessions for family unity and healing. Additionally, the Litany of the Miraculous Infant of Prague and the Litany of the Holy Childhood of Jesus provide deeper insights into the mercy and grace of the Infant Jesus. These resources, available in PDF formats, are ideal for personal reflection, family prayer, or community worship. They enrich your spiritual journey, fostering trust in the divine plan and a closer connection to the Divine Child Jesus.

sobre el diezmo en la biblia pdf

Biblical tithing involves giving a tenth of one’s income, rooted in Old Testament practices, supporting the temple, Levites, and the needy. While not mandated in the New Testament, it remains a voluntary act of faith and stewardship.

1.1 Definition and Significance of Tithing

Tithing, derived from the Hebrew term maaser, means giving a tenth of one’s income or produce as an act of worship and obedience. In the Old Testament, it was a commandment to support the Levites, maintain the temple, and aid the needy. The practice emphasized faith, gratitude, and trust in God’s provision. While the New Testament doesn’t enforce tithing as a law, it encourages generous and voluntary giving. Tithing symbolizes surrendering a portion of life to God, reflecting spiritual priorities and stewardship. Its significance lies in fostering a deeper relationship with God, promoting community support, and upholding religious institutions; Today, many Christians adopt tithing as a guideline for giving, though it’s not mandatory, highlighting its enduring relevance in spiritual life and service.

1.2 Historical Context of Tithing in the Bible

Tithing originates in the Old Testament as a practice commanded by God to the Israelites. It was a system of giving a tenth of their agricultural produce, livestock, and income to support the Levites, who managed the temple and performed sacred duties. This tithe ensured the temple’s maintenance and provided for the priests and their families. Additionally, tithes were used to care for the poor, widows, and orphans, demonstrating God’s concern for social justice. The practice was deeply rooted in Israel’s agrarian society and served as a form of worship and obedience. Over time, tithing evolved, and by the time of Jesus, it had become a significant religious obligation, though it also faced criticism for being practiced without genuine faith. This historical context highlights tithing’s role in sustaining religious and social structures in ancient Israelite society.

1.3 The Role of Tithing in Modern Christianity

In modern Christianity, tithing continues to hold significance, though its application varies across denominations. Many churches encourage believers to tithe as a form of worship and stewardship, often linking it to spiritual growth and obedience. The practice is seen as a way to support the church’s ministries, pay staff, and fund community outreach programs. While some view tithing as a strict 10% obligation, others interpret it more flexibly, emphasizing proportional giving based on ability. The New Testament concept of grace giving, which focuses on voluntary and cheerful giving, has influenced modern views on tithing. Debates persist about whether tithing is a biblical command for today’s church or a principle to be adapted. Nonetheless, tithing remains a vital part of Christian giving, reflecting a commitment to faith, community, and service.

Biblical Foundations of Tithing

Tithing originates in the Old Testament, where Israelites were commanded to give 10% of their income to support the temple, Levites, and needy, fulfilling a divine mandate.

2.1 The Origin of Tithing in the Old Testament

The practice of tithing traces its roots to ancient Israel, where it was a divine command to give a tenth of one’s produce and income. This offering was primarily destined for the support of the Levites, who were responsible for the upkeep of the temple and the spiritual guidance of the people. Additionally, tithes were used to maintain the temple itself and to assist the needy. The origins of tithing are found in the books of Leviticus and Deuteronomy, where it is presented as a form of worship and obedience to God. The Hebrew term “maaser,” meaning “a tenth,” encapsulates the essence of this practice. Over time, tithing became a significant aspect of Israelite society, reflecting their commitment to their faith and community.

2.2 The Hebrew Term “Maaser” and Its Meaning

The term “maaser,” derived from Hebrew, signifies “a tenth” or “to give a tenth.” It is deeply rooted in the biblical tradition of tithing, where the Israelites were commanded to set aside a tenth of their produce, livestock, and income as an offering to God. This practice was not only a form of worship but also a means of supporting the Levites and the maintenance of the temple. The concept of “maaser” emphasizes proportionate giving, reflecting a commitment to faith and stewardship. Its use in the Old Testament underscores the importance of obedience and gratitude towards God. Over time, “maaser” has become a cornerstone in discussions about tithing, symbolizing the allocation of resources as an act of devotion and community support. This term remains central to understanding the biblical foundations of tithing and its cultural significance.

2.3 Tithing as a Commandment in the Law of Moses

Tithing was a central commandment in the Law of Moses, mandated by God for the Israelites. It was a divine instruction to give a tenth of their produce, livestock, and income to support the Levites and the maintenance of the Tabernacle. The tithe was not optional but a sacred obligation, as outlined in Leviticus 27:30-32 and Numbers 18:21-24. This practice was essential for sustaining the priesthood and ensuring the continuity of worship. The Law also emphasized the consequences of neglecting the tithe, as seen in Malachi 3:9, where failure to tithe led to divine judgment. The tithe was a tangible expression of faith, obedience, and gratitude, reinforcing the covenant relationship between God and His people. It also taught the Israelites to trust in God’s provision and to prioritize spiritual priorities over material wealth.

Old Testament Practices of Tithing

The tithe was a tenth of one’s income or produce, given to support the Levites, the Temple, and the needy. It reflected obedience, gratitude, and trust in God’s provision.

3.1 The Tithe as a Portion for the Levites

In the Old Testament, the tithe was specifically designated as a portion for the Levites, who were responsible for the spiritual and ceremonial duties of Israel. The Levites, descended from the tribe of Levi, were not given a territorial inheritance like the other tribes, as their role was to serve the Lord and the community. Numbers 18:21-24 outlines that the tithe was given to the Levites as their inheritance, providing for their livelihood and enabling them to fulfill their sacred responsibilities. This practice emphasized God’s provision and the importance of supporting those dedicated to spiritual service. The tithe also symbolized the people’s obedience and trust in God’s covenant promises. It was a tangible expression of gratitude for His blessings and a recognition of His sovereignty over all resources.

3.2 The Tithe for the Maintenance of the Temple

In ancient Israel, the tithe also served as a means to maintain the Temple and its operations. The Temple was the central place of worship, and its upkeep required significant resources. The Levites, who were responsible for managing the Temple, relied on the tithes to fund its maintenance, including repairs, sacrifices, and the provision of materials for worship. This practice is recorded in 2 Chronicles 31:5-12 and Nehemiah 10:35-37, where the people faithfully brought their tithes to support the Temple’s functions. The tithe ensured that the Temple remained a sacred and functional space for the entire community. This system emphasized the collective responsibility of the people in sustaining their place of worship and honoring God through orderly and generous giving.

3.4 The Tithe as a Means of Supporting the Poor

In addition to supporting the Levites and maintaining the Temple, the tithe also played a crucial role in caring for the vulnerable members of society. The Bible teaches that a portion of the tithe was designated to assist the poor, including widows, orphans, and foreigners. This practice is rooted in Deuteronomy 14:28-29, where every third year, the tithe was collected and distributed to those in need. This act of giving reflected God’s heart for justice and compassion. Similarly, in Deuteronomy 26:12-13, the people were instructed to share their tithes with the marginalized, ensuring that no one was forgotten. By incorporating care for the poor into the tithing system, the Israelites demonstrated obedience to God’s commands and upheld the value of societal responsibility. This aspect of tithing highlighted the importance of generosity and equity in the community.

New Testament Perspectives on Giving

The New Testament emphasizes giving as an act of grace, generosity, and love, rather than a strict obligation. Jesus and Paul taught about giving willingly and cheerfully, focusing on heart-centered stewardship.

4.1 Is Tithing Mentioned in the New Testament?

The New Testament does not explicitly command tithing as a requirement for believers. While tithing is prominent in the Old Testament, the New Testament emphasizes giving as an act of grace and love. Jesus mentions tithing in Matthew 23:23, but He condemns the hypocrisy of those who focus on it while neglecting justice, mercy, and faith. The Apostle Paul teaches about giving willingly and generously (2 Corinthians 9:7), but he does not enforce a 10% rule. Instead, he promotes grace giving, where believers contribute according to their means and heart’s desire. This shift reflects the transition from the legal obligations of the Old Covenant to the voluntary, Spirit-led giving of the New Covenant.

4.2 Jesus’ Teachings on Giving and Generosity

Jesus’ teachings on giving and generosity emphasize the importance of a willing and cheerful heart. In Matthew 6:2-4, He warns against giving for recognition, urging believers to give in secret. The parable of the widow’s mite in Mark 12:41-44 highlights that true generosity is not about the amount but the heart’s willingness to give sacrificially. Jesus also teaches that giving should be done without expecting anything in return, as seen in Luke 6:38, where He says, “Give, and it will be given to you.” His teachings shift the focus from obligatory giving to a lifestyle of love, compassion, and trust in God’s provision. This approach encourages believers to view giving as an act of worship and an expression of faith, rather than a legalistic requirement.

4.3 The Apostle Paul’s Teachings on Financial Support for Ministry

The Apostle Paul provides significant guidance on financial support for ministry in the New Testament. In 1 Corinthians 9:14, he states that those who preach the gospel should receive their living from it, emphasizing the importance of supporting ministers. Paul also encourages believers to give willingly and generously in 2 Corinthians 9:7, highlighting that giving should be a cheerful act, not done under compulsion. Additionally, in Galatians 6:6, he instructs believers to share their resources with those who teach them the Word. Paul’s teachings emphasize the principle of grace giving, where believers contribute according to their means and with a grateful heart, rather than adhering to a strict tithing law. This approach fosters a spirit of partnership and mutual support within the church, reflecting God’s provision and faithfulness.

Theological Debates on Tithing

Tithing sparks theological debates, with some viewing it as a biblical command and others arguing it applies only to the Old Testament. Grace giving is often highlighted as a New Testament principle.

5.1 Arguments for Tithing as a Biblical Command

Many argue that tithing is a biblical command rooted in Scripture. In Malachi 3:10, God instructs Israel to bring the full tithe to the storehouse, promising blessings for obedience. Proponents emphasize that tithing predates the Law of Moses, as seen in Genesis 14:20, where Abram gave a tenth to Melchizedek. They argue that tithing is a universal principle, not limited to the Old Testament, as Hebrews 7:1-2 references Abraham’s tithe. Additionally, they claim that tithing reflects obedience to God’s command to honor Him with the firstfruits of one’s income. While some debate its application in the New Covenant, supporters insist that tithing remains a valid expression of worship and stewardship, aligning with biblical teachings on giving and trusting God’s provision.

5.2 Arguments Against Tithing as a New Testament Practice

Some scholars argue that tithing is not explicitly enforced as a command in the New Testament. While tithing is prominent in the Old Testament, Jesus and the apostles do not reinstitute it as a requirement for believers. In 2 Corinthians 9:7, Paul emphasizes giving cheerfully rather than by compulsion, suggesting a shift from obligatory tithing to voluntary, grace-based giving. Additionally, the New Testament focuses on spiritual priesthood, where all believers are considered priests, making the Old Testament model of supporting Levites less applicable; Critics also point out that tithing in the Bible was primarily tied to agricultural produce in ancient Israel, not modern income. Thus, they argue that tithing, as practiced today, is more of a cultural or traditional practice than a direct New Testament command.

5.3 The Concept of Grace Giving in the New Testament

The New Testament introduces the concept of grace giving, which contrasts with the obligatory nature of Old Testament tithing. This principle, rooted in the freedom of life in Christ, emphasizes giving as a response to God’s grace rather than a legal requirement. In 2 Corinthians 9:7, Paul writes that giving should be done “cheerfully” and “not reluctantly or under compulsion,” highlighting the voluntary nature of Christian giving. Grace giving is not limited to a specific percentage but encourages believers to give generously according to their means and the needs of others. This approach aligns with the teachings of Jesus, who emphasized the importance of the heart’s attitude in giving. Grace giving also reflects the unity and shared responsibility of believers in supporting one another and advancing God’s work, fostering a culture of generosity and love within the church.

Cultural and Historical Context of Tithing

Tithing has deep roots in ancient cultures, serving as a cornerstone of religious and societal practices. It evolved from voluntary offerings in early Christianity to mandatory taxes in medieval Europe, reflecting its enduring societal and spiritual significance.

6.1 Tithing Practices in Ancient Israelite Society

In ancient Israel, tithing was a central religious and social practice, deeply rooted in the Mosaic Law. The Israelites were commanded to give a tenth of their agricultural produce, livestock, and other resources to support the Levites and the maintenance of the Temple. This practice was not optional but a mandatory obligation, viewed as a way to honor God and acknowledge His provision. The tithe was collected annually, with a portion set aside every three years to support the poor, widows, and orphans. This system ensured social welfare and reinforced the community’s covenant with God. The practice was closely tied to the land and agriculture, reflecting the agrarian nature of ancient Israelite society. Over time, tithing became a symbol of obedience and faithfulness, shaping the spiritual and economic fabric of the nation.

6.2 The Evolution of Tithing in Early Christianity

The early Christian church experienced a significant shift in tithing practices compared to ancient Israel. With the destruction of the Temple in 70 AD, the traditional system of tithing to support the Levites and Temple services ceased. Early Christians adopted a more flexible approach to giving, influenced by Jesus’ teachings on generosity and love. The New Testament emphasizes voluntary offerings rather than a strict tithe, with Paul advocating for cheerful and sacrificial giving in 2 Corinthians 9:7. This shift reflected the church’s focus on community support, missionary work, and caring for the poor. While tithing was not explicitly enforced, many early Christians continued to give a tenth of their income as a spiritual discipline. Over time, tithing became more formalized in the church, aligning with its institutional growth and the needs of its expanding ministries.

6.3 Tithing in Modern Christian Denominations

In modern Christianity, tithing practices vary significantly across denominations. Many churches, such as Pentecostal and evangelical traditions, strongly emphasize tithing as a spiritual discipline, encouraging members to give 10% of their income to support church operations, missions, and community outreach. Some denominations, like the Seventh-day Adventist Church, have formalized tithing as a central practice, while others, such as some mainline Protestant churches, may focus more on proportional giving rather than a strict tithe. The Catholic Church, for instance, does not enforce tithing but encourages stewardship and generosity. Digital platforms have also made tithing more accessible, with online giving options. Despite these variations, the principle of tithing remains a key aspect of financial stewardship for many Christians, reflecting a commitment to supporting God’s work and fostering spiritual growth.

Practical Applications of Tithing Today

Modern Christians apply tithing through regular giving to churches, supporting ministries, and helping the needy, often using online platforms for convenient and consistent financial contributions to God’s work.

7.1 How to Calculate and Practice Tithing

To calculate tithing, start by identifying your income, whether from a salary, wages, or other sources. Typically, tithing involves giving 10% of your income to support religious activities or charitable causes; Decide whether to base this on your pre-tax (gross) income or after-tax (net) income, as both approaches are common. Some choose to tithe on their gross income as an act of faith and trust in God’s provision.

Next, determine where to direct your tithe. Historically, tithes were given to support the priesthood and maintain places of worship. Today, many Christians give their tithe to their local church or to ministries that align with their faith values. Consider prayerfully about where your contribution will most effectively support God’s work.

Practicing tithing consistently requires discipline and intentionality. Set up a regular schedule, such as giving a portion of each paycheck, to make tithing a habitual part of your financial stewardship. Some find it helpful to automate their giving through online platforms or church apps to ensure consistency.

Finally, approach tithing with a spirit of gratitude and obedience, recognizing it as an act of worship. Reflect on how your giving aligns with biblical teachings and supports the advancement of God’s kingdom. Remember, tithing is not just about the amount but also about the heart behind the giving.

7.2 The Spiritual Benefits of Tithing

Tithing holds profound spiritual significance, fostering a deeper relationship with God and cultivating a life of faith and trust. By prioritizing God in finances, individuals demonstrate reliance on His provision rather than personal resources. This act of obedience opens hearts to spiritual growth and humility, shifting focus from material wealth to eternal values.

Tithing also nurtures gratitude, acknowledging God as the source of all blessings. It teaches contentment and generosity, helping believers detach from worldly possessions. Regular tithing fosters discipline and integrity, aligning actions with biblical principles. Many find that tithing brings peace and joy, knowing their resources are used for kingdom purposes.

Ultimately, tithing is an act of worship that honors God and reflects trust in His faithfulness. It invites His blessings, not just financially but spiritually, as it aligns one’s life with His will.

7.3 Common Misconceptions About Tithing

Several misconceptions surround biblical tithing, often leading to confusion among believers. One common misconception is that tithing is strictly an Old Testament practice with no relevance in the New Testament era. However, while the New Testament emphasizes grace giving, it does not explicitly void the principle of tithing. Another misconception is that tithing must solely involve money, whereas the biblical concept originally pertained to agricultural produce and livestock. Some also believe that tithing is a rigid legalistic obligation, but it is rooted in worship and voluntary obedience. Additionally, the idea that tithing guarantees material prosperity is a misinterpretation, as spiritual blessings are its primary focus. Understanding tithing within its biblical and cultural context helps clarify these misunderstandings and promotes a healthier approach to giving.

Biblical tithing reflects a profound act of worship, rooted in faith and obedience. Its historical significance and modern relevance emphasize stewardship and trust in God’s provision, fostering spiritual growth and community support.

8.1 Summary of Biblical Teachings on Tithing

Biblical teachings on tithing emphasize its role as a form of worship, obedience, and stewardship. Originating in the Old Testament, tithing was a command to give a tenth of one’s income to support the Levites, the temple, and the community. It symbolized trust in God’s provision and recognition of His ownership over all things. In the New Testament, while tithing isn’t explicitly enforced, principles of generosity, grace giving, and supporting ministry are highlighted. Jesus and Paul taught about giving with a willing and cheerful heart, shifting the focus from a legal obligation to a spiritual act of love. Tithing remains a practical way for Christians to honor God, prioritize spiritual values, and contribute to the needs of the church and the poor. It reflects a deeper commitment to faith, stewardship, and community.

8.2 The Relevance of Tithing in Contemporary Christianity

Tithing remains a vital practice in contemporary Christianity, serving as a tangible expression of faith and stewardship. Many churches and believers continue to embrace tithing as a way to financially support ministry, fund community outreach, and sustain church operations. It fosters a sense of responsibility and accountability among Christians, encouraging them to prioritize God in their finances. Additionally, tithing helps combat materialism by reminding believers that all resources are entrusted to them by God. While some debates exist about its application in the New Testament era, the principle of giving generously and systematically remains central to Christian living. Tithing also promotes unity within the church, as it supports collective efforts to spread the Gospel and care for those in need. Its relevance lies in its ability to connect modern believers with ancient biblical principles of faith, gratitude, and obedience.

8.3 Final Thoughts on Giving and Stewardship

Giving and stewardship are central to Christian living, reflecting a believer’s faith, trust, and gratitude toward God. Tithing, as a form of giving, serves as a practical expression of surrendering to God’s will and acknowledging His provision. While debates about its specifics persist, the underlying principle of generous, sacrificial giving remains unchanged. Stewardship extends beyond finances to encompass time, talents, and resources, emphasizing that all things belong to God. True stewardship is not about legalism but about aligning one’s life with God’s purposes. Giving fosters spiritual growth, unity, and the advancement of God’s kingdom. Ultimately, it challenges believers to trust God’s faithfulness and live with eternal perspective. As Christians, embracing stewardship and giving is a powerful way to honor God and reflect His love in a world in need.

oster bread machine recipes pdf

Discover the versatility of Oster bread machine recipes through various PDF resources‚ offering easy-to-follow guides for classic and customizable bread options‚ enhancing your baking experience with convenience and creativity.

1.1 Overview of the Oster Bread Machine

The Oster Bread Machine is a versatile and user-friendly appliance designed to simplify bread-making at home. It features advanced settings like ExpressBake‚ which allows for faster baking‚ and a delay timer for convenient meal planning. The machine supports various loaf sizes and crust colors‚ catering to different preferences. With its intuitive interface and robust construction‚ it ensures consistent results for both novice and experienced bakers. The Oster Bread Machine also comes with a comprehensive manual‚ including safety guidelines and troubleshooting tips‚ ensuring safe and effective use. Its compatibility with a wide range of recipes‚ from classic white bread to whole wheat and sourdough‚ makes it a versatile kitchen companion. PDF resources‚ such as the Oster Expressbake Cookbook‚ further enhance its functionality by providing detailed recipes and expert instructions.

1.2 Importance of Using a Bread Machine

Using a bread machine simplifies the bread-making process‚ saving time and effort while ensuring consistent results. It automates mixing‚ kneading‚ and baking‚ making homemade bread accessible to everyone. The Oster Bread Machine‚ in particular‚ offers features like the ExpressBake setting‚ allowing for faster preparation of fresh bread. This convenience is ideal for busy households seeking to enjoy healthy‚ preservative-free bread without the hassle. Additionally‚ bread machines enable customization‚ catering to dietary needs like gluten-free or whole wheat options. They also promote experimentation with various flavors‚ enhancing creativity in the kitchen. With resources like the Oster Expressbake Cookbook‚ users can explore a wide array of recipes‚ further highlighting the machine’s versatility and value in modern cooking.

1.3 Benefits of Oster Bread Machine Recipes

Oster Bread Machine Recipes offer unparalleled convenience and flexibility for home bakers. These recipes are designed to maximize the machine’s capabilities‚ ensuring perfectly baked bread every time. They cater to various dietary preferences‚ including gluten-free‚ whole wheat‚ and sourdough options‚ making them suitable for all households. The recipes are straightforward‚ requiring minimal preparation and effort‚ while still delivering professional-quality results. Additionally‚ they allow for customization‚ enabling users to experiment with unique flavors and ingredients. The availability of these recipes in PDF formats‚ such as the Oster Expressbake Cookbook‚ provides easy access and organization‚ making it simpler for users to explore diverse baking possibilities. This convenience and versatility make Oster Bread Machine Recipes a valuable resource for both novice and experienced bakers.

Understanding the Oster Expressbake Bread Machine

The Oster Expressbake Bread Machine is a versatile appliance designed for effortless bread-making. It features advanced settings and a user-friendly interface‚ making it ideal for both novices and experienced bakers.

2.1 Features of the Oster Expressbake Model

The Oster Expressbake Bread Machine is equipped with a range of innovative features that make bread-making effortless. It includes the Expressbake setting‚ which allows for faster baking cycles‚ and multiple preset settings for various bread types‚ such as basic‚ whole wheat‚ and gluten-free. The machine also offers customizable crust color control‚ enabling users to choose between light‚ medium‚ or dark crusts. Additionally‚ it features a delay timer‚ allowing bread to be ready exactly when needed. With a large LCD display and intuitive buttons‚ the model ensures easy navigation. It supports different loaf sizes‚ from 1 to 2 pounds‚ catering to various household needs. The machine’s durable design and advanced temperature control further enhance its performance‚ making it a reliable choice for home bakers.

2.2 How the Expressbake Setting Works

The Expressbake setting on the Oster Bread Machine is designed for faster bread production without compromising quality. This feature bypasses the traditional long rise times‚ allowing users to bake a fresh loaf in under an hour. The machine achieves this by accelerating the fermentation process‚ using a combination of optimized temperature control and rapid mixing cycles. Users can select from pre-programmed Expressbake options‚ which automatically adjust time and temperature for perfect results; Simply add ingredients‚ choose the Expressbake setting‚ and the machine handles the rest. This feature is ideal for busy households‚ ensuring freshly baked bread is ready quickly and effortlessly. The Expressbake setting is a standout feature for those seeking convenience and efficiency in their bread-making routine.

2.3 Basic Setup and Safety Precautions

Setting up your Oster Bread Machine is straightforward‚ but following safety guidelines is essential for optimal performance and longevity. Begin by unpacking the machine and placing it on a stable‚ heat-resistant surface. Ensure the area is clean and dry before plugging it in. Avoid exposing the machine to direct sunlight or moisture. Always read the manual before first use to understand its operation. Safety precautions include keeping children away‚ not touching hot surfaces during operation‚ and avoiding splashing liquids into the machine. Regularly clean the pan and paddles to prevent residue buildup. Never leave the machine unattended during operation‚ and always unplug it when not in use. Proper setup and adherence to safety guidelines ensure a safe and enjoyable bread-making experience.

Popular Oster Bread Machine Recipes

Discover popular Oster Bread Machine recipes‚ including classic white bread‚ whole wheat‚ and gluten-free options. Advanced bakers can explore sourdough creations for unique flavors.

3.1 Classic White Bread Recipe

The Classic White Bread Recipe is a timeless favorite‚ perfect for beginners and experienced bakers alike. It requires simple ingredients like all-purpose flour‚ salt‚ sugar‚ yeast‚ and warm water. To ensure success‚ use bread machine yeast for optimal rise. Add ingredients in the order recommended by your Oster machine’s instructions. Select the basic bread setting with a 2-pound loaf size and medium crust color. Allow the machine to knead and bake‚ resulting in a soft‚ fluffy loaf. For best results‚ check the dough consistency during the kneading cycle and adjust liquid or flour as needed. This recipe is versatile and can be customized with optional additions like butter or herbs for extra flavor.

3.2 Whole Wheat Bread Recipe

The Whole Wheat Bread Recipe is a healthier alternative to classic white bread‚ offering a nuttier flavor and more fiber. Combine whole wheat flour‚ bread flour‚ salt‚ sugar‚ yeast‚ and warm water in your Oster machine. For better texture‚ add a tablespoon of vital wheat gluten. Select the whole grain or basic bread setting with a 2-pound loaf size and medium crust. Optional additions include sunflower seeds or nuts for extra nutrition and flavor. Let the machine handle the mixing‚ kneading‚ and baking. Ensure the dough is moist but not sticky; adjust flour or water as needed. This recipe yields a dense yet soft loaf‚ perfect for sandwiches or toast. Experiment with ratios of whole wheat to bread flour for varying textures.

3.3 Gluten-Free Bread Options

Gluten-free bread options are perfect for those with dietary restrictions‚ offering delicious and safe alternatives. Use a mix of gluten-free flours like rice‚ almond‚ or coconut flour‚ combined with xanthan gum or guar gum for structure. Add sugar‚ salt‚ yeast‚ eggs‚ and warm water. Select the gluten-free or basic bread setting on your Oster machine. For better texture‚ include apple cider vinegar or olive oil. Ensure ingredients are fresh and measured accurately for optimal results. Optional additions like seeds or herbs can enhance flavor. Avoid overmixing to prevent density. Let the machine handle the rest‚ producing a soft and fresh loaf. Experiment with ratios of flours to find your preferred taste and texture‚ making gluten-free bread accessible and enjoyable for everyone.

3.4 Sourdough Bread for Advanced Users

Sourdough bread is a classic choice for advanced bakers‚ offering a tangy‚ chewy texture. Begin by creating a sourdough starter‚ a natural yeast culture fermented over days. Combine flour‚ water‚ and salt to feed the starter‚ allowing it to develop before use. In the Oster machine‚ select the basic or sourdough setting‚ which allows longer fermentation. Add ingredients like bread flour‚ water‚ salt‚ and optional yeast for a boost. The machine handles mixing and proofing‚ but manual adjustments may be needed. Experiment with ratios to achieve desired flavor. For authenticity‚ minimal ingredients are best. This traditional method results in a hearty‚ flavorful loaf perfect for sandwiches or toast. Advanced users can refine their technique for a personalized sourdough experience.

Customizing Your Bread Recipes

Customizing your bread recipes allows for endless creativity‚ enabling you to tailor flavors and ingredients to suit your taste preferences and dietary needs.

4.1 Adding Ingredients for Unique Flavors

Enhance your bread recipes by incorporating unique ingredients to create distinctive flavors. Herbs‚ spices‚ cheeses‚ and seeds can add depth and variety to your bread. For savory options‚ try adding garlic‚ rosemary‚ or olives‚ while dried fruits or nuts offer a sweet twist. Experiment with different combinations‚ like sun-dried tomatoes and basil for an Italian-inspired loaf or cinnamon and raisins for a sweet bread. Ensure ingredients are evenly distributed and not excessive‚ as this can disrupt the machine’s operation. Toasting spices or nuts before adding them can intensify their flavor. Always refer to your Oster bread machine recipes PDF for guidance on proportions and compatibility. This customization allows you to craft personalized bread that suits your taste preferences perfectly.

4.2 Adjusting Yeast and Salt Ratios

Proper yeast and salt ratios are crucial for optimal bread texture and flavor in your Oster bread machine. Yeast drives the rise‚ while salt enhances flavor and controls yeast activity. Typically‚ recipes call for 1-2% salt and 1-2% yeast relative to the flour weight. Excess salt can inhibit yeast growth‚ leading to a dense loaf‚ while too little may result in an overly yeasty taste. Adjustments may be needed based on altitude‚ humidity‚ or recipe type. Always measure accurately and consult your Oster bread machine recipes PDF for specific guidelines. Balancing these ratios ensures a well-structured‚ flavorful loaf every time‚ whether you’re making classic white bread or experimenting with custom creations.

4.3 Exploring Different Flour Types

Exploring different flour types can elevate your bread-making experience with the Oster bread machine. All-purpose flour is a versatile choice for classic recipes‚ while bread flour‚ with its higher gluten content‚ yields chewier loaves. Whole wheat flour adds nutty flavors and extra fiber‚ but may require adjustments in liquid content. Gluten-free flours‚ such as almond or coconut flour‚ cater to dietary restrictions but often need additional binders like xanthan gum. Ancient grains like rye or spelt offer unique textures and flavors. Experimenting with these flours allows you to create diverse bread varieties. Always refer to your Oster bread machine recipes PDF for specific guidelines‚ as different flours may require tweaks in measurements or settings to ensure perfect results. This exploration opens up countless possibilities for customization and innovation in your baking.

Troubleshooting Common Issues

Common issues with your Oster bread machine include dense bread‚ undercooked loaves‚ or error codes. Check ingredient ratios‚ dough consistency‚ and machine settings for optimal results.

5.1 Why Your Bread Might Be Too Dense

Your bread may turn out too dense due to several factors. Overmixing the dough can develop too much gluten‚ leading to a tough texture. Using too much flour or insufficient liquid can also result in density. Old or inactive yeast might fail to rise properly. Additionally‚ incorrect machine settings‚ such as using the wrong crust color or loaf size‚ can affect the outcome. High altitude may require adjustments in yeast or liquid levels. Always ensure accurate measurements and proper yeast activation. If issues persist‚ consult your Oster bread machine manual for troubleshooting guides or refer to the Oster Bread Machine Recipes PDF for detailed instructions.

5.2 Fixing Undercooked or Overcooked Loaves

Undercooked or overcooked loaves can be frustrating‚ but they often result from incorrect settings or timing. Ensure your Oster bread machine is set to the right crust color and loaf size‚ as these affect cooking time and temperature. Too little yeast or old yeast can cause undercooked bread‚ while too much yeast may lead to overcooking. Check your ingredient measurements and ensure the machine’s temperature is accurate. For undercooked bread‚ extend the baking time slightly. For overcooked bread‚ reduce the timer or choose a lighter crust setting. Always monitor the loaf during the last stages of baking. Refer to your Oster Bread Machine Recipes PDF for troubleshooting tips and precise adjustments to achieve perfectly cooked bread every time.

5.3 Dealing with Machine Error Codes

If your Oster bread machine displays error codes‚ it’s essential to address them promptly to ensure proper functioning. Common codes like E01 or E02 often indicate issues with temperature sensors or motor overload. Refer to your Oster Bread Machine Recipes PDF manual for specific code meanings. Power cycles or unplugging the machine can sometimes resolve these issues. Ensure the bread pan is properly aligned and clean‚ as obstructions can trigger errors. For persistent codes‚ consult the troubleshooting section in the manual or contact Oster support. Regular maintenance‚ like cleaning sensors‚ can prevent errors. Always follow the guide in your Oster Bread Machine Recipes PDF for accurate solutions to maintain your machine’s performance and extend its lifespan.

Oster Bread Machine Recipes PDF Resources

Discover a variety of Oster bread machine recipes in PDF formats. Access official cookbooks‚ free downloadable guides‚ and online communities for endless baking inspiration and support.

  • Official Cookbook: Comprehensive recipes and tips.
  • Free Guides: Easy-to-follow instructions for beginners.
  • Online Forums: Share and discover new ideas.

6.1 Official Oster Cookbook and Manual

The official Oster cookbook and manual is a treasure trove for bread enthusiasts‚ offering a wide range of recipes tailored for Oster bread machines. This comprehensive guide includes detailed instructions‚ measurements‚ and tips to ensure perfect loaves every time. It covers classic bread recipes‚ whole wheat options‚ gluten-free variations‚ and even advanced recipes like sourdough. The manual also provides troubleshooting tips and safety guidelines to help users maintain their machines. Available in PDF format‚ it’s easily accessible and serves as a go-to resource for both beginners and experienced bakers. Whether you’re exploring new flavors or refining your technique‚ the official Oster cookbook is an indispensable tool for mastering bread making.

6.2 Free Downloadable Recipe Guides

Free downloadable recipe guides for Oster bread machines are widely available online‚ offering a variety of bread recipes in PDF format. These guides are perfect for users looking to expand their recipe collection without purchasing additional cookbooks. Many websites provide these guides‚ often including classic bread recipes‚ whole wheat options‚ and gluten-free variations. Some guides also include helpful tips for using your Oster bread machine effectively. While they may not be as detailed as the official manual‚ they serve as excellent supplementary resources. Users can easily print or save these guides for quick reference. They are ideal for experimenting with new flavors and techniques‚ making them a valuable asset for both new and experienced bakers. Always ensure you download from trusted sources for quality and safety.

6.3 Online Communities and Forums

Online communities and forums are excellent resources for discovering Oster bread machine recipes and troubleshooting tips. Platforms like Facebook groups‚ Reddit‚ and specialized baking forums are filled with active users sharing their experiences. Many members post their favorite recipes‚ including PDF guides‚ and offer advice on optimizing your bread machine’s performance. These communities often include discussions on customizing recipes‚ resolving common issues‚ and exploring creative ideas. Engaging with these forums allows you to connect with fellow bakers‚ learn from their expertise‚ and gain confidence in experimenting with new recipes. Additionally‚ some forums host giveaways or contests‚ further encouraging innovation and collaboration among members. Participating in these online spaces can elevate your bread-making skills and provide endless inspiration for your Oster bread machine.

Advanced Features of the Oster Bread Machine

The Oster Bread Machine offers advanced features like customizable settings‚ delay timers‚ dough preparation modes‚ and yogurt settings for versatile and convenient bread-making experiences.

7.1 Delay Timer for Convenience

The Oster Bread Machine features a delay timer‚ allowing users to schedule their bread-making process up to 13 hours in advance. This convenient feature ensures that fresh bread is ready exactly when needed‚ whether it’s for breakfast or dinner. Simply add ingredients‚ set the timer‚ and let the machine do the work. The delay timer is particularly useful for busy households‚ enabling users to prepare dough or bake bread while away‚ ensuring a warm‚ freshly baked loaf upon return. This feature enhances flexibility and simplifies the bread-making process‚ making it easier to incorporate homemade bread into daily routines. The timer function works seamlessly with various settings‚ including rapid bake and gluten-free options‚ ensuring consistent results every time.

7.2 Customizable Settings for Different Loaf Sizes

The Oster Bread Machine offers customizable settings to accommodate different loaf sizes‚ ranging from 1.5 to 2 pounds. This feature ensures that users can tailor their bread-making process to suit their household needs‚ whether they’re baking for a small family or a larger gathering. The machine allows adjustments to crust color and baking time‚ providing consistent results regardless of loaf size. This versatility is particularly useful for experimenting with various recipes‚ from small batches of artisan bread to larger loaves for daily use. By optimizing settings for different sizes‚ users can achieve perfectly baked bread every time‚ making the Oster Bread Machine a practical and adaptable addition to any kitchen.

7.3 Dough Preparation and Yogurt Settings

The Oster Bread Machine’s dough preparation setting allows users to mix‚ knead‚ and let dough rise without baking‚ perfect for preparing dough ahead of time. This feature is especially useful for those who prefer to shape their dough manually or bake in a conventional oven. Additionally‚ the yogurt setting is designed to create lighter‚ fluffier bread by adjusting fermentation times and temperatures. This setting is ideal for recipes requiring a tender crumb‚ such as sandwich bread or buns. Both settings enhance versatility‚ enabling users to explore a wide range of bread-making possibilities with ease and precision.

Maintaining Your Oster Bread Machine

Regular cleaning and proper storage are essential to ensure optimal performance and longevity. Always unplug the machine before cleaning and avoid using abrasive cleaners. Wipe down the exterior with a damp cloth and dry thoroughly. For the bread pan and paddle‚ wash them with warm‚ soapy water after each use; Sanitize by rinsing thoroughly and drying with a clean towel. Store the machine in a cool‚ dry place‚ away from direct sunlight. For parts that are dishwasher-safe‚ follow the manufacturer’s instructions. Check and replace worn-out components like the paddle or seals as needed. Lubricate moving parts occasionally to prevent friction. Descale the machine periodically if you use hard water to prevent mineral buildup. Refer to the user manual for specific maintenance recommendations to keep your Oster Bread Machine in excellent working condition and ensure consistent baking results.

8.1 Cleaning and Sanitizing the Appliance

Cleaning and sanitizing your Oster Bread Machine is crucial for maintaining hygiene and ensuring consistent baking results. Always unplug the machine before cleaning to avoid accidents. Use a soft‚ damp cloth to wipe down the exterior‚ avoiding abrasive cleaners that could damage the finish. For the bread pan and paddle‚ wash them with mild soap and warm water after each use. Rinse thoroughly and dry with a clean towel to prevent water spots. Sanitize by soaking these parts in a solution of equal parts water and white vinegar for 10 minutes. For tough stains or dough residue‚ mix baking soda and water to create a paste‚ apply it to the affected areas‚ and let it sit before scrubbing gently. Never submerge the machine itself in water or put it in the dishwasher. Regular sanitizing helps prevent mold growth and keeps your bread machine in prime condition for delicious recipes.

8.2 Storing the Machine Properly

Proper storage of your Oster Bread Machine is essential to maintain its functionality and longevity. Always store the machine in a cool‚ dry place‚ away from direct sunlight and moisture. Before storing‚ ensure the machine is completely clean and dry to prevent mold or mildew growth. Detach the bread pan and paddle‚ and store them separately in a protective covering to avoid dust accumulation. If you plan to store the machine for an extended period‚ consider placing it in its original packaging or a sturdy box to protect it from scratches or damage. Avoid storing it in humid environments‚ such as basements‚ or in areas with extreme temperatures‚ like garages or attics. Proper storage ensures your machine remains ready for use whenever you need it for baking delicious bread recipes.

8.3 Regular Maintenance Tips

Regular maintenance is crucial to keep your Oster Bread Machine functioning optimally. After each use‚ clean the machine thoroughly‚ paying attention to the bread pan‚ paddle‚ and any crevices where dough may accumulate. Use a soft cloth and mild detergent to wipe down surfaces‚ avoiding abrasive cleaners that could damage the finish. Lubricate moving parts occasionally to ensure smooth operation. Check the machine’s belts and seals for wear and tear‚ replacing them if necessary. Additionally‚ ensure the machine is stored in a dry environment to prevent rust or corrosion. Regularly update the machine’s firmware if applicable‚ and descale it periodically to remove mineral buildup from water. By following these maintenance tips‚ you can extend the lifespan of your Oster Bread Machine and ensure consistent performance for all your bread recipes.

Mastery of the Oster Bread Machine unlocks endless possibilities for delicious homemade bread. Explore recipes‚ experiment with flavors‚ and enjoy the convenience of fresh‚ perfectly baked loaves.

9.1 Summary of Key Points

The Oster Bread Machine offers a versatile and efficient way to bake fresh bread at home. Its user-friendly design and advanced features‚ such as the ExpressBake setting‚ cater to both novices and experienced bakers. By following simple recipes and customization tips‚ users can create a variety of bread types‚ from classic white to gluten-free options. Troubleshooting common issues‚ like dense loaves or error codes‚ ensures consistent results. Regular maintenance and proper cleaning extend the machine’s lifespan. With downloadable PDF guides and online resources‚ bakers can explore endless possibilities‚ making the Oster Bread Machine a valuable addition to any kitchen.

9.2 Encouragement to Experiment with Recipes

Experimenting with Oster bread machine recipes is a great way to unlock your creativity and enjoy freshly baked bread tailored to your taste preferences. Don’t hesitate to try new ingredients‚ such as herbs‚ spices‚ or cheeses‚ to create unique flavor profiles. The machine’s versatility allows you to explore various bread types‚ from crusty sourdough to soft‚ sweet breads. With downloadable PDF guides‚ you can access a wide range of inspiration and step-by-step instructions. Remember‚ baking is an art that thrives on experimentation‚ so don’t be afraid to tweak recipes or invent your own. This journey of discovery will not only enhance your baking skills but also bring joy to sharing homemade bread with family and friends.

novels in spanish pdf

Discover a diverse range of Spanish novels in PDF format, from classic works by Cervantes to modern authors like García Márquez, all easily accessible for free download.

Overview of Spanish Literature in Digital Format

Spanish literature in digital format has revolutionized access to classic and modern novels, offering readers a vast library of works in PDF. Platforms like Elejandría, Casa del Novela, and Booknet provide free downloads of novels by renowned authors such as Cervantes, García Márquez, and Allende. These digital libraries ensure that Spanish literature reaches a global audience, promoting cultural enrichment and education. With convenient access to public domain works and legally shared content, readers can explore timeless stories and contemporary narratives effortlessly.

Why Spanish Novels in PDF Are Popular

Spanish novels in PDF have gained immense popularity due to their accessibility and convenience. Readers can easily download and carry hundreds of titles on their devices, making them ideal for travel or daily commutes. Additionally, many classic and modern works are available for free, catering to budget-conscious readers. The digital format also supports multilingual learners and Spanish-language enthusiasts worldwide, fostering a broader appreciation for Hispanic culture and literature. This ease of access has contributed significantly to their global appeal and popularity.

Popular Platforms for Downloading Spanish Novels

Platforms like Elejandría, Casa del Novela, and Booknet offer free Spanish novels in PDF, providing easy access to diverse literary works without registration or costs.

Elejandría: A Comprehensive Library of Free Novels

Elejandría offers a vast collection of free novels in PDF, EPUB, and MOBI formats, all legally available for download without registration. With over 2,000 titles, including classic works by authors like Cervantes and modern novels, the platform caters to diverse literary tastes. Its user-friendly interface allows easy browsing by genre, author, or collection. Elejandría also uses AI to recommend books based on user preferences, making it a go-to destination for book lovers seeking high-quality, accessible literature.

Casa del Novela: Direct Downloads Without Registration

Casa del Novela provides a seamless experience for downloading Spanish novels in PDF format without requiring registration. Users can access a wide variety of books with just one click, ensuring convenience and accessibility. The platform focuses on offering high-quality literature, including classic and contemporary works, making it an ideal choice for readers seeking effortless and quick access to their favorite Spanish novels online.

Booknet: A Vast Collection of Free Books

Booknet offers an extensive library of over 40,000 free books, including Spanish novels, available for easy download or online reading. With a user-friendly interface, it provides access to a wide range of genres, from classic literature to contemporary works. The platform supports reading on various devices, making it ideal for mobile users. Booknet’s diverse collection, including works by authors like Agatha Christie and Calderón de la Barca, ensures there’s something for every reader’s preference, all accessible without registration.

Key Authors of Spanish Novels Available in PDF

Explore renowned authors like Miguel de Cervantes, Gabriel García Márquez, and Isabel Allende, whose iconic works are widely available in PDF format, enriching Spanish literature globally.

Miguel de Cervantes: The Father of Spanish Literature

Miguel de Cervantes, a towering figure in Spanish literature, is celebrated for his timeless masterpiece, “Don Quixote”, a foundational work in world literature. His writings, including “Novelas Ejemplares” and “The Travels of Persiles and Sigismunda”, showcase his profound insight into human nature. Cervantes’ works, now in the public domain, are widely available in PDF format, allowing readers to access his genius freely. His legacy extends beyond literature, influencing art, culture, and philosophy globally.

Gabriel García Márquez: Magical Realism in Spanish

Gabriel García Márquez, a Nobel Prize-winning author, revolutionized literature with his unique style of magical realism. His iconic novel, “One Hundred Years of Solitude”, captivates readers with its blend of fantasy and reality. Other notable works, such as “Love in the Time of Cholera” and “Chronicle of a Death Foretold”, are also widely admired. His novels, now available in PDF format, continue to enchant readers globally, offering a gateway to the rich cultural tapestry of Latin America and the magic of his storytelling.

Isabel Allende: Bestselling Novels in Spanish

Isabel Allende, a renowned Chilean author, captivates readers with her captivating storytelling and rich emotional depth. Her iconic novel, “The House of the Spirits”, explores themes of love, family, and political upheaval. Other notable works, such as “Eva Luna” and “Daughter of Fortune”, blend history, romance, and adventure. Her novels, widely available in PDF format, offer readers a seamless way to immerse themselves in her vivid worlds, making her one of the most beloved Spanish-language authors globally.

Popular Spanish Novels in PDF Format

Explore a wide selection of Spanish novels in PDF, including timeless classics like Don Quixote and contemporary bestsellers, all easily accessible for free download online.

“Don Quixote” by Miguel de Cervantes

Don Quixote, written by Miguel de Cervantes, is a foundational work of Western literature. This timeless tale follows the adventures of Don Quixote and his squire, Sancho Panza, as they navigate a world of chivalric illusions and harsh realities. Exploring themes of madness, reality, and the human condition, this classic novel remains a cornerstone of Spanish literature. Available in PDF format, it can be downloaded for free from platforms like Elejandría and Casa del Novela, ensuring its accessibility to readers worldwide.

“One Hundred Years of Solitude” by Gabriel García Márquez

One Hundred Years of Solitude is a masterpiece of magical realism by Gabriel García Márquez. Set in the fictional town of Macondo, the novel traces the fortunes and misfortunes of the Buendía family, exploring themes of fate, solitude, and the cyclical nature of time. Rich in vivid imagery and profound symbolism, this iconic work is widely regarded as a cornerstone of Latin American literature. Available in PDF format, it can be downloaded from platforms like Booknet and Elejandría, making it easily accessible to readers worldwide.

“The House of the Spirits” by Isabel Allende

The House of the Spirits by Isabel Allende is an epic tale of love, family, and politics, spanning generations of the Trueba family. Set against the backdrop of Chile’s turbulent history, the novel intertwines magical realism with vivid storytelling. Its complex characters and emotional depth have made it a global bestseller. Available in PDF format, this masterpiece can be downloaded from platforms like Casa del Novela and Booknet, offering readers a convenient way to explore Allende’s captivating narrative.

Benefits of Reading Spanish Novels in PDF

Spanish novels in PDF offer unmatched accessibility, convenience, and affordability. They enable readers to enjoy classic and modern literature anywhere, anytime, while supporting eco-friendly and cost-effective reading habits.

Accessibility and Convenience

Spanish novels in PDF format are highly accessible, allowing readers to download and enjoy books instantly. Platforms like InfoLibros and Casa del Novela offer direct downloads without registration, making it easy to start reading. PDFs are compatible with various devices, ensuring portability and flexibility. This format enables readers to access literature anytime, anywhere, without the need for physical storage. The convenience of digital novels promotes a seamless reading experience, catering to diverse preferences and schedules, while also supporting legal and free access to quality literature.

Free and Legal Downloads

Spanish novels in PDF are often available as free and legal downloads, thanks to platforms like Elejandría and Casa del Novela. These sites specialize in public domain works or books with open licenses, ensuring legal access. Readers can explore classic and modern titles without copyright concerns. The convenience of free downloads fosters a culture of accessibility, allowing everyone to enjoy quality literature. This model supports both authors and readers by promoting free and lawful sharing of literary works, making Spanish novels widely available to global audiences.

Environmentally Friendly Option

Downloading Spanish novels in PDF format is an eco-friendly choice, reducing the need for paper and minimizing carbon emissions from printing and transportation. Digital books allow readers to access multiple titles on a single device, conserving space and resources. This option supports sustainability while maintaining easy access to literature. By choosing PDFs, readers contribute to a greener future without compromising on the joy of reading. Digital libraries like Elejandría and Casa del Novela further promote this eco-conscious approach to book consumption.

Classic vs. Modern Spanish Novels

Spanish novels in PDF format offer a rich contrast between timeless classic themes and contemporary storytelling, catering to readers seeking both traditional and modern literary experiences.

Timeless Themes in Classic Novels

Classic Spanish novels in PDF explore universal themes like love, honor, and social justice, resonating across generations. Works like “Don Quixote” and “Tres novelas ejemplares” delve into human nature and morality, while others, such as “El hermano Juan o el mundo es teatro”, reflect societal critiques. These stories, now accessible in digital formats, continue to captivate readers with their enduring relevance and profound insights into the human condition, making them essential reads for anyone exploring Spanish literature.

Contemporary Issues in Modern Novels

Modern Spanish novels in PDF often address current societal challenges, such as identity, social inequality, and political upheaval. Authors like Isabel Allende and Gabriel García Márquez blend magical realism with contemporary themes, exploring family dynamics, love, and isolation. These works, available through platforms like Booknet and Elejandría, resonate with today’s readers by reflecting modern struggles while maintaining a deep connection to cultural heritage, making them both relatable and thought-provoking for a global audience.

Spanish Romance Novels in PDF

Spanish romance novels in PDF are widely popular, offering emotional depth and passionate stories. Platforms like Booknet and Elejandría provide free downloads, catering to fans of romantic fiction.

Best Romantic Novels to Download

Discover captivating Spanish romantic novels in PDF, perfect for emotional escapes. Platforms like Booknet and Elejandría offer free downloads of timeless classics and modern tales. From passionate dramas to heartfelt love stories, these novels showcase rich narratives and relatable characters. Popular titles include El Amor en los Tiempos del Cólera and La Sombra del Ciprés, ensuring a diverse selection for romance enthusiasts. Explore these stories and immerse yourself in the beauty of Spanish romantic literature, all conveniently available in digital format.

Authors Specializing in Romance

Explore the works of renowned Spanish authors who excel in crafting romantic narratives. Writers like Corín Tellado and Javier Sierra captivate readers with their emotional depth and intricate love stories. Their novels, often available in PDF format, blend passion, drama, and cultural richness. Platforms like Booknet and Elejandría offer free downloads of their works, making it easy to enjoy these timeless tales. Dive into the world of Spanish romance through these talented authors’ contributions to the genre.

Spanish Novels for Young Adults

Engaging Spanish novels in PDF format cater to young adults, offering relatable themes, adventure, and contemporary issues. Explore vibrant stories that resonate with youthful experiences and emotions.

Popular YA Novels in Spanish

Young adult readers can explore a variety of engaging Spanish novels in PDF format. Titles like La Sombra del Viento by Carlos Ruiz Zafón and El Laberinto de los Espíritus captivate with mysterious and emotional journeys. La Ciudad de los Prodigios by Eduardo Mendoza and El Cuaderno de Maya by Isabel Allende are also favorites. These stories, available for free download on platforms like Booknet and Elejandría, delve into themes of identity, adventure, and coming-of-age, resonating deeply with young audiences in Spanish-speaking communities and beyond.

Themes and Genres Appealing to Young Readers

Spanish YA novels often explore themes of identity, coming-of-age, and self-discovery, resonating deeply with young audiences. Genres like fantasy, adventure, and romance are particularly popular, offering escapes into magical worlds or relatable emotional journeys. Stories about friendship, family, and overcoming challenges are also prevalent, making these novels accessible and engaging for teenagers. The availability of these works in PDF format ensures that young readers can easily access and enjoy these captivating stories, fostering a love for Spanish literature and diverse storytelling traditions.

The Impact of Digital Libraries

Digital libraries have revolutionized access to Spanish novels, offering free and legal downloads globally. Platforms like Elejandría, Casa del Novela, and Booknet provide diverse works, fostering a love for literature and empowering authors.

How Digital Libraries Promote Spanish Literature

Digital libraries play a crucial role in promoting Spanish literature by making classic and contemporary works widely accessible. Platforms like Elejandría, Casa del Novela, and Booknet offer free, legal downloads of novels in PDF, ensuring global reach. These libraries preserve timeless classics while introducing readers to modern authors, fostering a love for Spanish literature. With features like curated collections and user-friendly interfaces, they empower readers to explore diverse genres and support emerging writers, creating a vibrant community around Spanish literary heritage.

Global Accessibility of Spanish Novels

The rise of digital libraries has made Spanish novels accessible worldwide, breaking geographical barriers. Platforms like Elejandría and Casa del Novela offer free, legal downloads in PDF, enabling readers globally to explore Spanish literature. This accessibility fosters cultural exchange, allowing diverse audiences to engage with classic and contemporary works. With novels available on various devices, from smartphones to e-readers, Spanish literature reaches readers in every corner of the world, promoting its rich cultural heritage on an unprecedented scale.

A Guide for New Readers

Start your journey with popular Spanish novels like Don Quixote or One Hundred Years of Solitude. Explore free platforms like Elejandría or Casa del Novela for easy downloads.

Where to Start with Spanish Novels

Begin your exploration of Spanish novels by visiting platforms like Elejandría or Casa del Novela, which offer free and legal downloads in PDF format. These platforms provide access to classic works like Don Quixote by Miguel de Cervantes and modern masterpieces like One Hundred Years of Solitude by Gabriel García Márquez. Start with these iconic novels to gain a deep understanding of Spanish literature and its rich cultural heritage. This approach ensures a smooth transition into the world of Spanish novels.

Essential Novels for Beginners

For newcomers to Spanish literature, essential novels include Don Quixote by Miguel de Cervantes, considered the foundation of Spanish literature. One Hundred Years of Solitude by Gabriel García Márquez introduces magical realism, while The House of the Spirits by Isabel Allende offers a captivating family saga. These works provide a gateway to understanding the richness and diversity of Spanish storytelling, making them perfect for those beginning their literary journey in Spanish.

casl-2 subtest descriptions pdf

The Comprehensive Assessment of Spoken Language, Second Edition (CASL-2), is a research-based tool designed to evaluate spoken language skills in individuals aged 3 through 21. It includes 14 subtests, each targeting specific language abilities, such as core language, lexical/semantic skills, and pragmatic judgment. The CASL-2 subtest descriptions PDF provides detailed insights into each assessment area, helping professionals understand and prepare for evaluations. This resource is essential for speech-language pathologists, educators, and clinicians working with diverse populations, including those with autism or other language challenges.

Overview of CASL-2

The Comprehensive Assessment of Spoken Language, Second Edition (CASL-2), is a widely used, research-based tool designed to evaluate spoken language skills in individuals aged 3 through 21. It comprises 14 subtests, each targeting specific aspects of language abilities, such as core language, lexical/semantic skills, syntactic skills, and pragmatic language. The CASL-2 subtest descriptions PDF provides detailed insights into each subtest, helping professionals understand the skills being assessed and how to interpret results effectively. This resource is invaluable for speech-language pathologists, educators, and clinicians, offering a comprehensive framework for identifying language strengths and weaknesses. The CASL-2 is particularly useful for assessing diverse populations, including those with autism, hearing impairments, or other language challenges.

Importance of Assessing Spoken Language Skills

Assessing spoken language skills is crucial for identifying strengths and weaknesses in communication abilities. Language skills are fundamental to academic success, social interactions, and emotional development. The CASL-2 subtest descriptions PDF highlights the importance of evaluating various aspects of spoken language, such as lexical/semantic skills, syntactic skills, and pragmatic language. Early identification of language difficulties can lead to timely interventions, improving outcomes for individuals with autism, hearing impairments, or other challenges. The CASL-2 provides a comprehensive framework for understanding spoken language, enabling professionals to develop targeted strategies and monitor progress effectively. By assessing these skills, educators and clinicians can support individuals in achieving their full communication potential.

Structure of the CASL-2 Assessment

The CASL-2 assessment is structured to evaluate spoken language skills through 14 subtests, each targeting specific aspects of language ability. These subtests are divided into core language abilities, such as lexical/semantic and syntactic skills, as well as pragmatic and nonliteral language. The assessment is designed for individuals aged 3 through 21, making it versatile for a wide range of developmental stages. The CASL-2 subtest descriptions PDF provides detailed information about each subtest, including the skills measured and sample items. The structure ensures a comprehensive evaluation, allowing professionals to identify strengths and weaknesses. Administration is individualized, with subtests varying in length and complexity. Scoring is standardized, with norm-referenced interpretations to guide diagnostic decisions and intervention planning; This structured approach ensures accurate and reliable assessment of spoken language skills.

CASL-2 Subtest Descriptions

The CASL-2 subtest descriptions PDF outlines 14 detailed assessments, each evaluating specific spoken language skills, such as core abilities, lexical/semantic knowledge, and pragmatic judgment, ensuring comprehensive evaluation.

Core Language Abilities Subtest

The Core Language Abilities subtest assesses foundational spoken language skills, including comprehension, expression, and vocabulary. It evaluates the ability to understand basic concepts and use language effectively. This subtest is essential for identifying strengths and weaknesses in fundamental communication abilities, providing a baseline for further assessment. The CASL-2 subtest descriptions PDF offers detailed insights into this subtest, helping professionals understand its structure and scoring. By focusing on core skills, this subtest ensures a comprehensive evaluation of an individual’s language proficiency, making it a crucial component of the CASL-2 assessment. It is particularly useful for diagnosing language impairments and monitoring progress over time in both clinical and educational settings.

Lexical/Semantic Skills Subtest

The Lexical/Semantic Skills subtest evaluates an individual’s ability to understand and use vocabulary effectively. It assesses skills such as identifying synonyms, antonyms, and understanding words in context. This subtest also measures semantic processing, including comprehension of complex sentences and figurative language. By analyzing these abilities, professionals can identify strengths and weaknesses in lexical-semantic knowledge. The CASL-2 subtest descriptions PDF provides detailed guidance on administering and interpreting this subtest. It is particularly useful for diagnosing language impairments related to vocabulary and semantic processing. The results can inform targeted interventions to improve word retrieval, comprehension, and overall language use. This subtest is a critical component of the CASL-2 assessment, offering insights into foundational semantic and lexical abilities.

Syntactic Skills Subtest

The Syntactic Skills subtest evaluates an individual’s ability to understand and produce grammatically correct sentences. It assesses skills such as identifying sentence structure, comprehension of complex syntax, and the ability to form sentences accurately. This subtest is crucial for identifying difficulties in sentence formulation and understanding, which are essential for effective communication. The CASL-2 subtest descriptions PDF provides detailed information on how to administer and interpret this subtest. It is particularly useful for diagnosing syntactic language impairments and planning targeted interventions. By focusing on sentence-level skills, professionals can gain insights into an individual’s grammatical competence and develop strategies to improve their syntactic abilities. This subtest is a valuable tool for speech-language pathologists and educators working to enhance language development.

Pragmatic Language Subtest

The Pragmatic Language subtest assesses an individual’s ability to use language appropriately in social contexts. It evaluates skills such as initiating and maintaining conversations, understanding social cues, and adapting language to different situations. This subtest is particularly useful for identifying difficulties in social communication, which are common in individuals with autism or other developmental disorders. The CASL-2 subtest descriptions PDF provides detailed guidance on administering and interpreting this subtest. By focusing on real-world communication skills, professionals can gain insights into an individual’s pragmatic language abilities and develop targeted interventions to improve social interactions. This subtest is a valuable tool for speech-language pathologists and clinicians working with diverse populations.

Nonliteral Language Subtest

The Nonliteral Language subtest evaluates an individual’s ability to understand and interpret language that goes beyond literal meaning, such as idioms, sarcasm, and metaphors. This subtest assesses comprehension of implied meanings, figurative expressions, and nuanced language often used in everyday communication. It is particularly useful for identifying difficulties in understanding complex or abstract language, which can impact social interactions and academic performance. The CASL-2 subtest descriptions PDF provides detailed information on how this subtest measures these skills. By focusing on nonliteral language, professionals can gain insights into an individual’s ability to interpret contextually dependent language and develop strategies to improve their understanding. This subtest is a critical component of the CASL-2, offering valuable data for targeted interventions.

Ambiguous Sentences Subtest

The Ambiguous Sentences Subtest evaluates an individual’s ability to interpret sentences with multiple possible meanings. It assesses how well a person can process and understand contextually ambiguous language, which is critical for effective communication. This subtest presents sentences that can be interpreted in more than one way, requiring the examinee to identify the most appropriate meaning based on context. The CASL-2 subtest descriptions PDF provides detailed information on this assessment, including examples of test items and scoring guidelines. This subtest is particularly useful for identifying difficulties in understanding nuanced language, which can impact social interactions and academic performance. By focusing on ambiguous sentences, professionals can gain insights into an individual’s ability to interpret complex language and develop targeted strategies to improve their comprehension skills. This subtest is a valuable component of the CASL-2, offering actionable data for interventions.

Idiomatic Language Subtest

The Idiomatic Language Subtest is designed to assess an individual’s ability to understand and interpret idiomatic expressions, which are phrases or sentences with meanings that differ from the literal interpretation of the individual words. This subtest evaluates how well a person can recognize and comprehend common idioms, colloquialisms, and figurative language, which are essential for effective communication in everyday conversations. The CASL-2 subtest descriptions PDF provides detailed information about this assessment, including sample items and scoring criteria. This subtest is particularly useful for identifying individuals who may struggle with understanding nonliteral language, which can impact their ability to engage in socially appropriate interactions. By evaluating idiomatic language skills, professionals can better understand an individual’s strengths and challenges in using and interpreting figurative expressions. This subtest is a critical component of the CASL-2, offering valuable insights for language assessment and intervention planning.

Interpreting CASL-2 Results

Understanding standard scores and subtest scores is crucial for identifying language strengths and weaknesses. This process helps professionals develop targeted interventions to support individuals’ communication development effectively.

Understanding Standard Scores

Standard scores are a critical component of interpreting CASL-2 results. The average standard score is 100, with a standard deviation of 15, allowing comparisons to a normative sample. Scores below 85 indicate below-average performance, while scores above 115 suggest above-average abilities. Each subtest is scored individually, reflecting specific language skills. Understanding these scores helps identify strengths and weaknesses, guiding targeted interventions. Professionals use these scores to assess progress over time and inform educational or therapeutic plans. The CASL-2 subtest descriptions PDF provides detailed explanations of scoring criteria, ensuring accurate interpretation. This system enables a comprehensive understanding of an individual’s language abilities, facilitating effective support strategies.

Analyzing Subtest Scores

Analyzing CASL-2 subtest scores involves comparing individual performance across the 14 subtests to identify patterns of strength and weakness. Each subtest measures specific language skills, such as lexical/semantic abilities or pragmatic judgment. Scores are interpreted relative to the standard score mean of 100, with a standard deviation of 15. For example, a score of 85 or below may indicate a need for targeted intervention in areas like nonliteral language or ambiguous sentences. Professionals can use the CASL-2 subtest descriptions PDF to understand the skills assessed in each subtest and interpret results more effectively. This detailed analysis helps tailor interventions and monitor progress over time, ensuring a comprehensive approach to supporting language development.

Identifying Language Strengths and Weaknesses

The CASL-2 subtest descriptions PDF is a valuable resource for identifying language strengths and weaknesses by providing detailed insights into each subtest’s purpose and structure; By analyzing standard scores, professionals can determine if a child’s performance falls above or below the mean of 100. Scores above 115 typically indicate strong abilities, while scores below 85 may signal areas needing support. For example, high scores in the Pragmatic Language subtest suggest strong social communication skills, while lower scores in the Nonliteral Language subtest may indicate difficulties with figurative language. The PDF guide helps professionals interpret these results, enabling them to create targeted intervention plans and monitor progress effectively, ensuring a comprehensive approach to language development and support.

Clinical Applications of CASL-2

CASL-2 is clinically applied for diagnosing language disorders, informing intervention strategies, and monitoring progress. It aids in identifying specific strengths and weaknesses, guiding targeted therapeutic approaches effectively.

Using CASL-2 for Diagnostic Purposes

The CASL-2 is a valuable diagnostic tool for identifying spoken language difficulties in individuals aged 3 through 21. Its 14 subtests assess various language skills, including pragmatic language, nonliteral language, and idiomatic expressions. By evaluating these areas, clinicians can pinpoint specific strengths and weaknesses, aiding in the diagnosis of language disorders. The assessment is particularly useful for individuals with autism, as it measures social communication skills. The subtests are administered individually, starting at the client’s chronological age, with basal and ceiling rules ensuring efficient testing. Results are interpreted using standard scores, helping determine if a child’s language skills fall within typical ranges or require intervention. This comprehensive approach makes CASL-2 an essential resource for speech-language pathologists and educators.

Informing Intervention Strategies

The CASL-2 subtest descriptions provide valuable insights into a child’s language abilities, enabling professionals to design targeted intervention strategies. By identifying specific strengths and weaknesses, clinicians can tailor interventions to address areas needing improvement. For instance, if a child performs poorly on the Pragmatic Language subtest, activities focusing on social communication and conversational skills can be prioritized. The detailed subtest descriptions in the PDF guide professionals in selecting appropriate exercises and materials. This ensures interventions are both effective and personalized, helping children overcome language challenges and improve their overall communication skills. The CASL-2 thus serves as a critical tool for developing and refining intervention plans tailored to individual needs.

Monitoring Progress Over Time

The CASL-2 subtest descriptions enable clinicians to monitor progress effectively by providing a clear baseline and tracking changes in language skills over time. The detailed subtest results allow professionals to identify areas of improvement and persisting challenges, ensuring interventions remain focused and effective. By administering the CASL-2 at intervals, speech-language pathologists can document developmental gains and adjust strategies as needed. The standardized scoring system ensures consistency in measuring progress, while the subtest descriptions offer insights into specific skill areas. This longitudinal approach helps professionals and caregivers understand growth patterns and make data-driven decisions. The CASL-2 is particularly useful for monitoring children with language impairments or those in specialized programs, such as cochlear implant users, ensuring tailored support over time. Regular assessments with CASL-2 guide meaningful progress tracking and informed decision-making.

Resources for CASL-2

Key resources include the CASL-2 Subtest Descriptions PDF, which provides detailed insights into each subtest, and the comprehensive manual offering administration and scoring guidelines. Additional support materials are available online.

Accessing the CASL-2 Subtest Descriptions PDF

The CASL-2 Subtest Descriptions PDF is a valuable resource for professionals seeking detailed insights into each subtest. It provides in-depth explanations of the skills measured, item examples, and scoring guidelines. This document is particularly useful for speech-language pathologists, educators, and clinicians to prepare for assessments and interpret results accurately. The PDF can be downloaded from official sources or through authorized distributors of the CASL-2 assessment materials. Additionally, it is often included in the CASL-2 assessment kit or available as a standalone resource. Accessing this PDF ensures professionals have a comprehensive understanding of each subtest, enabling effective evaluation and intervention planning for individuals with diverse language needs.

Recommended References and Manuals

For a deeper understanding of the CASL-2 Subtest Descriptions, several key resources are recommended. The official Comprehensive Assessment of Spoken Language, Second Edition (CASL-2) manual provides detailed explanations of each subtest, administration guidelines, and scoring procedures. Supplementary guides, such as the CASL-2 Subtest Descriptions PDF, offer additional insights into the structure and purpose of each assessment area. These resources are essential for speech-language pathologists, educators, and clinicians to ensure accurate and effective use of the CASL-2. They can be accessed through the publisher’s website or authorized distributors, making them invaluable tools for professionals working with individuals requiring language assessments.

notice of intent to lien california pdf

The Notice of Intent to Lien is a formal document alerting property owners of unpaid debts for construction work or services. It preserves lien rights.

1.1 Definition and Purpose

The Notice of Intent to Lien is a formal document that alerts property owners of unpaid debts related to construction work or services. Its primary purpose is to provide a final opportunity for payment before legal action is taken. Rooted in California Civil Code Section 8200, this document preserves the lien rights of contractors, subcontractors, or suppliers. It serves as a warning that unpaid debts may result in a Mechanics Lien being filed against the property, which can hinder its sale or refinancing until the debt is resolved. The notice is a critical step in protecting parties involved in construction projects.

1.2 Importance of the Document in Construction Projects

The Notice of Intent to Lien plays a crucial role in ensuring payment for construction work or services. It protects the rights of contractors, subcontractors, and suppliers by serving as a formal warning to property owners about unpaid debts. This document is essential for maintaining cash flow in construction projects and preventing disputes. By issuing the notice, parties can address payment issues before escalating to legal action. It also emphasizes the seriousness of non-payment, encouraging prompt resolution to avoid further complications like filing a Mechanics Lien, which can delay property sales or refinancing.

Legal Requirements for Filing a Notice of Intent to Lien

The Notice of Intent to Lien must comply with California lien laws, including the Preliminary 20-Day Notice and filing within specific deadlines after non-payment occurs.

2.1 California Civil Code Section 8200 Compliance

Compliance with California Civil Code Section 8200 is mandatory for filing a Notice of Intent to Lien. This section outlines the legal framework for lien rights, requiring a Preliminary 20-Day Notice to be served before filing a Notice of Intent. Proper documentation and adherence to timelines are critical to ensure enforceability. Failure to comply may result in the loss of lien rights; The code specifies the requirements for content, delivery, and deadlines, ensuring all parties are notified appropriately. Understanding Section 8200 is essential for maintaining legal standing in lien-related matters in California.

2.2 Mandatory Preliminary Notice (20-Day Notice)

The Mandatory Preliminary Notice, often referred to as the 20-Day Notice, is a critical step in California’s lien process. It must be served within 20 days of furnishing labor, materials, or services to inform the property owner, contractor, and lender of potential lien rights. This notice preserves the right to file a Notice of Intent to Lien or a Mechanics Lien later. Failure to serve this notice can result in the loss of lien rights. It is a statutory requirement designed to provide transparency and ensure all parties are aware of unpaid claims. Proper documentation and timely delivery are essential for compliance.

2.3 Deadline for Filing After Non-Payment

In California, the Notice of Intent to Lien must be filed within specific timelines after non-payment. Typically, if payment remains unresolved, a Mechanics Lien must be filed within 10 days of serving the Notice of Intent to Lien. This strict deadline ensures that lien rights are enforced promptly. Failure to meet this timeframe can result in the loss of lien rights, making it crucial to act swiftly. Proper documentation and adherence to statutory timelines are essential to maintain legal standing and secure payment for services or materials provided. Timely filing preserves contractors’ and subcontractors’ rights under California law.

Key Elements of a Notice of Intent to Lien

A Notice of Intent to Lien includes project details, payment terms, and legal consequences of non-payment, ensuring clarity and compliance with California lien laws.

3.1 Project and Property Details

The Notice of Intent to Lien must include specific details about the project and property, such as the property address, description of the work performed, and the type of improvement made. It should also identify the parties involved, including the contractor, subcontractor, or supplier. Accurate project and property details ensure the document is valid and enforceable under California law. This section helps establish a clear connection between the unpaid debt and the specific property or project, preventing disputes and ensuring compliance with legal requirements.

3.2 Amount of Debt and Payment Terms

The Notice of Intent to Lien must clearly state the total amount of debt owed for materials, labor, or services provided. It should outline the payment terms, including any previously agreed-upon conditions or deadlines. The document must specify how the debt was calculated and whether interest or late fees apply. This section ensures transparency and provides the property owner with a clear understanding of the financial obligation. It also serves as a final opportunity for payment before further legal action, such as filing a mechanics lien, is pursued to recover the unpaid amount.

3.4 Legal Consequences of Non-Payment

If the debt remains unpaid, the Notice of Intent to Lien serves as a warning that a Mechanics Lien will be filed against the property. This legally binds the property, making it difficult to sell or transfer ownership until the debt is settled. Failure to respond may result in foreclosure proceedings to satisfy the lien. The document emphasizes the seriousness of non-payment and the potential legal actions that will be taken to recover the owed amount, ensuring the creditor’s rights are protected under California law.

How to Prepare a Notice of Intent to Lien

Gather project details, debt amount, and payment terms. Draft the document clearly, ensuring compliance with California lien laws. Review for accuracy before finalizing and serving.

4.1 Gathering Necessary Information

To prepare a Notice of Intent to Lien, gather essential details about the project, including property address, work performed, and unpaid amounts. Include the contractor-subcontractor relationship, payment terms, and dates. Accurate records of invoices, contracts, and communication are crucial. Ensure compliance with California Civil Code Section 8200 by verifying lien rights eligibility. Collect all relevant documentation to support the claim. Organize the information clearly to avoid errors or omissions, as inaccuracies can delay or invalidate the lien process. Attention to detail is critical to ensure the notice is enforceable and legally sound.

4.2 Drafting the Document

Drafting a Notice of Intent to Lien requires careful attention to detail. Use a California-specific template to ensure compliance with state laws. Include the property owner’s name, project address, and a detailed description of the unpaid work or materials. Clearly state the total amount owed and payment terms. Reference the Preliminary Notice and California Civil Code Section 8200. Specify the deadline for payment and the intent to file a mechanics lien if unpaid. Ensure the language is clear and professional, avoiding ambiguity. Double-check all information for accuracy before finalizing the document.

4.3 Reviewing and Finalizing the Notice

After drafting, thoroughly review the Notice of Intent to Lien for accuracy and completeness. Verify the property description, debt amount, and payment terms. Ensure compliance with California Civil Code Section 8200 and include all required details. Proofread for clarity and correctness. Have a legal professional or colleague review the document to catch any errors or omissions. Once finalized, sign and date the notice, ensuring it is ready for service. Maintain a copy for your records and prepare for delivery via registered or certified mail, as required by law.

Delivery and Service of the Notice

The Notice of Intent to Lien must be delivered via registered or certified mail to ensure proof of service, complying with California legal requirements.

5.1 Methods of Delivery (Registered or Certified Mail)

Delivery of the Notice of Intent to Lien must be done via registered or certified mail to ensure proof of service. This method provides a formal record of delivery, which is crucial for legal compliance. Registered mail offers tracking and confirmation of receipt, while certified mail requires a signature upon delivery. Both methods ensure the property owner is officially notified, fulfilling California’s legal requirements. Proper documentation of delivery is essential to maintain the validity of the lien process and prevent potential disputes or delays in enforcement.

5;2 Proof of Service Requirements

Proof of service is essential to confirm that the Notice of Intent to Lien was properly delivered. This typically involves obtaining a receipt or affidavit from the delivery method used, such as registered or certified mail. A signed acknowledgment from the recipient or a tracking record from the postal service serves as valid proof. Maintaining detailed records of the delivery process is crucial, as courts may require evidence that the notice was legally served. Failure to provide proper proof of service can invalidate the lien filing, emphasizing the importance of meticulous documentation and adherence to California’s legal standards.

5.3 Deadline Extension for Service

The deadline for serving the Notice of Intent to Lien in California can be extended under specific circumstances. If proof of service is not obtained within the initial timeframe, the deadline to file the lien may be prolonged. This extension is particularly relevant when delivery is attempted but not successfully completed, such as when the recipient refuses to accept the notice. Proper documentation of the delivery attempt is crucial to support the extension request; Failure to meet the original deadline without a valid extension can result in the loss of lien rights, emphasizing the importance of timely and accurate service.

Response to the Notice of Intent to Lien

This section discusses the property owner’s options upon receiving a Notice of Intent to Lien, emphasizing timely payment or negotiation to avoid lien filing.

6.1 Property Owner’s Options

Upon receiving a Notice of Intent to Lien, property owners have several options. They can pay the outstanding debt to prevent lien filing, negotiate a payment plan, or dispute the claim if they believe it is unjustified. Owners may also seek legal advice to understand their rights and obligations. Prompt action is crucial to avoid further legal consequences, as ignoring the notice may lead to a Mechanics Lien being filed. Addressing the issue quickly can help protect the property from lien-related complications and ensure the matter is resolved efficiently.

6;2 Payment or Negotiation

Property owners can resolve the issue by paying the outstanding amount or negotiating a payment plan with the claimant. Payment should be made within the specified timeframe, typically 10 days, to avoid lien filing. Written confirmation of payment terms is recommended to ensure clarity. If the debt is disputed, owners may contest the claim or seek mediation. Prompt payment or negotiation can prevent further legal action and protect the property from a Mechanics Lien. Addressing the matter swiftly helps maintain good relations and avoids potential financial and legal complications.

6.3 Consequences of No Response

If the property owner fails to respond to the Notice of Intent to Lien, the claimant may proceed to file a Mechanics Lien. This lien creates a legal burden on the property, making it difficult to sell or refinance. If unresolved, the claimant can initiate foreclosure proceedings to recover the debt. Non-response may also harm the owner’s credit score and lead to additional legal fees. Ignoring the notice escalates the situation, emphasizing the importance of prompt action to avoid severe financial and legal consequences. Timely communication is crucial to prevent long-term complications.

Filing a Mechanics Lien After the Notice

Filing a Mechanics Lien after the Notice of Intent is a legal step to secure payment. It involves submitting required documents and adhering to California’s statutory timeline.

7.1 Timeframe for Filing

In California, a Mechanics Lien must be filed within 10 days after serving the Notice of Intent to Lien. This strict deadline ensures the lien is recorded timely. Failure to meet this timeframe results in losing lien rights. The lien is typically filed with the county recorder’s office where the property is located. Proper documentation, including proof of service, must accompany the filing. Missing this deadline can prevent securing the debt, making prompt action critical to protecting your rights as a contractor or subcontractor.

7.2 Required Documentation

Filing a Mechanics Lien in California requires specific documentation to ensure compliance with state laws. The completed Mechanics Lien form (EJ-185) must be submitted, along with a copy of the Notice of Intent to Lien previously served. Additional documentation includes the Preliminary 20-Day Notice, proof of service, and a detailed breakdown of unpaid charges. Contracts, invoices, and records of labor or materials provided may also be necessary. All documents must be notarized and accurately reflect the debt and property details to avoid delays or legal challenges.

7.3 Legal Process and Fees

Filing a Mechanics Lien in California involves specific legal steps and associated costs. The lien must be recorded with the county recorder’s office where the property is located, accompanied by a filing fee, which varies by county. Additional fees may apply for serving the lien via registered mail or publishing it in a local newspaper. Proper documentation and compliance with California Civil Code Section 8424 are essential to ensure the lien is enforceable. Failure to meet legal requirements may result in dismissal of the lien, emphasizing the need for precision and adherence to deadlines.

Downloading and Using a California Notice of Intent to Lien PDF

Access California Notice of Intent to Lien PDF templates on platforms like US Legal Forms or Templateroller.com. Easily download, fill, edit, and print for legal compliance.

8.1 Popular Platforms for Templates

Popular platforms like US Legal Forms and Templateroller.com offer downloadable California Notice of Intent to Lien PDF templates. These platforms provide easy-to-use, customizable forms that cater to legal requirements. Users can instantly download templates in PDF or Word format, fill them out online, and print them for official use. These websites ensure compliance with California lien laws, making the process efficient and stress-free. They also offer guides and customer support to assist with form preparation and filing.

8.2 Filling Out the PDF Form

Filling out the California Notice of Intent to Lien PDF requires careful attention to detail. The form typically includes sections for project and property details, the amount owed, and payment terms. Users must accurately input the property owner’s name, address, and a description of the work performed. The outstanding amount and legal consequences of non-payment should be clearly stated. Ensure all fields are completed legibly, either by typing or handwriting. Use a PDF editor or print and fill out manually. Double-check for errors to avoid delays in processing. Compliance with California lien laws is crucial for the document’s validity.

8.3 Printing and Signing the Document

Once the Notice of Intent to Lien PDF is filled out, print it on standard paper. Ensure the document is clear and legible. Sign the form in the presence of a notary public if required by California law. The signature confirms the accuracy of the information provided. Keep a copy for your records and attach proof of service. Proper execution and signing are critical for the document’s validity. Failure to sign or notarize (if needed) may render the notice unenforceable. Always maintain a copy for future reference and legal purposes.

Best Practices for Using the Notice of Intent to Lien

Send the notice early to prompt payment. Maintain detailed records and ensure compliance with California lien laws. Understand your rights and avoid filing errors to prevent delays.

9.1 Maintaining Records

Maintaining detailed records is essential when using a Notice of Intent to Lien in California. Keep copies of all correspondence, contracts, and payment records. Document every communication with the property owner or contractor. Store the original Notice of Intent to Lien and proof of delivery, such as certified mail receipts. Organize digital and physical files securely to ensure easy access. Accurate records help prevent disputes and provide evidence if legal action is necessary. Proper documentation demonstrates compliance with California lien laws and strengthens your case in case of non-payment.

9.2 Understanding Lien Rights

Understanding lien rights is crucial for contractors and subcontractors in California. A Notice of Intent to Lien safeguards these rights by allowing a claim against property for unpaid work or materials. Familiarize yourself with California’s lien laws, including deadlines and requirements, to ensure compliance. Properly filing a Preliminary 20-Day Notice is essential to preserve lien rights. Knowing your rights helps avoid legal disputes and ensures fair compensation for services rendered. Stay informed about lien regulations to protect your interests effectively in construction projects. Awareness of these rights is key to navigating payment issues successfully.

9.3 Avoiding Common Mistakes

Avoiding common mistakes is vital when handling a Notice of Intent to Lien in California. Ensure all deadlines are met, as missing them can forfeit lien rights. Verify that all project and property details are accurate to prevent disputes. Failure to serve the notice properly or deliver it via registered mail can invalidate the process. Additionally, avoid errors in calculating the debt amount or payment terms. Compliance with California Civil Code Section 8200 is non-negotiable. Double-check all information before finalizing and serving the notice to maintain its legal validity and enforceability.

The Notice of Intent to Lien is a critical tool for protecting payment rights in California construction projects. Timely action and proper documentation are essential for success.

10.1 Summary of Key Points

The Notice of Intent to Lien in California is a critical document for contractors and subcontractors to secure payment for construction work or services. It must comply with California Civil Code Section 8200 and include a Preliminary Notice. Key elements are project details, debt amount, and legal consequences. Timely filing and proper delivery via certified mail are essential. Missing deadlines can jeopardize lien rights. The document preserves payment rights and encourages prompt resolution. Maintaining records and understanding lien laws are best practices to avoid disputes and ensure compliance with California regulations.

10;2 Importance of Timely Action

Taking timely action is crucial when dealing with a Notice of Intent to Lien in California. Missing deadlines can result in the loss of lien rights, reducing leverage for payment recovery. Filing and delivering the notice within the required timeframe ensures compliance with California Civil Code Section 8200. Delaying action can lead to prolonged disputes and legal complications. Prompt submission demonstrates professionalism and seriousness, encouraging property owners to address unpaid debts swiftly. Timely action also helps maintain project continuity and preserves the contractor’s ability to secure payment through legal means if necessary.

10.3 Role in Protecting Contractors and Subcontractors

The Notice of Intent to Lien plays a vital role in protecting contractors and subcontractors by providing a legal framework to secure unpaid debts. It ensures that their contributions to construction projects are recognized and compensated, preventing financial losses. By formalizing payment disputes, it maintains project integrity and upholds contractual obligations. This document is a proactive measure that safeguards the rights of workers and suppliers, ensuring fair compensation and project continuity.